Showing posts with label Icing. Show all posts

Monday, September 03, 2012

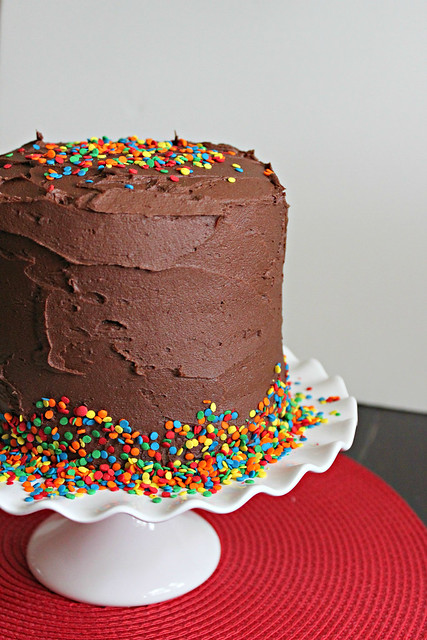
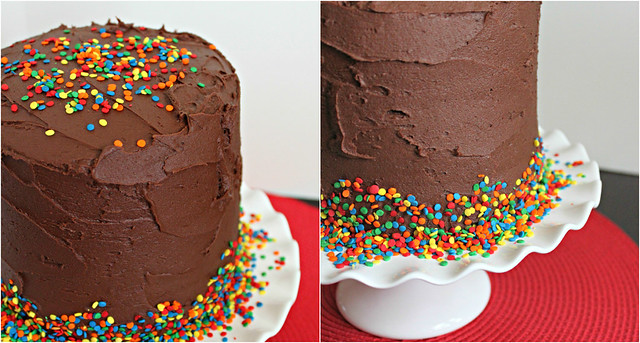
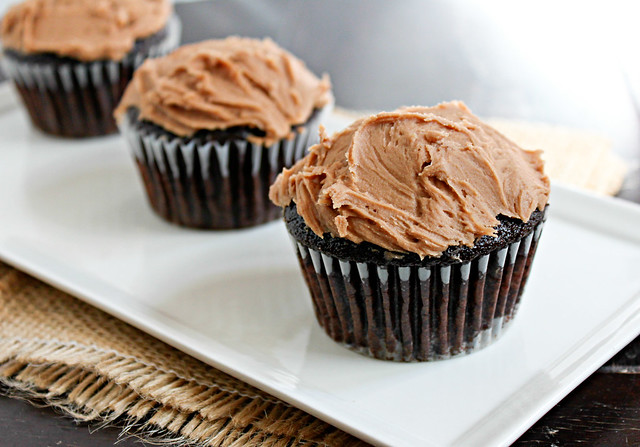
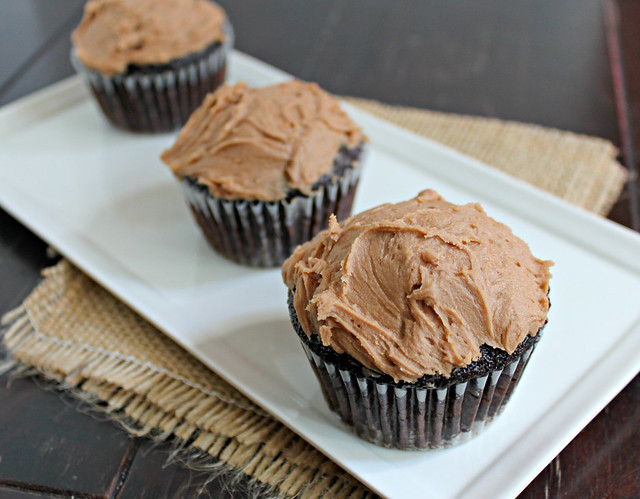
Russell’s Birthday Cake: Chocolate Cake with Chocolate Icing

Chocolate Cake with Chocolate Icing
This past weekend was a big weekend for us. Russell was off on Friday for Labor day (he had Monday off too), his birthday was this past weekend, and college football started!  When I asked Russell what kind of cake he wanted for his birthday he said dirt cake. I love dirt cake as much as the next person, but since we were having friends over to celebrate I thought it might be good to have an actual cake as well. Russell loves chocolate cake so I decided to make a small (6”) cake incase someone didn’t want dirt cake for dessert. Russell had a great birthday and Alabama’s weekend opener against Michigan went great, we won 41-14!

PicMonkey Collage 4
I made my new favorite chocolate cake that is so simple. I multiplied the original recipe by 1.5 so I would have enough for a 3-tier 6” cake. You will find below the different amounts that you will need to make different cake sizes. I didn’t get any pictures after the cake was cut, but it was great. I had just enough icing for a 3-tier, 6-inch cake so if you are making a larger cake you will probably need to double the icing recipe below. 

Chocolate Cake with Chocolate Icing


Printer-Friendly Version

For the cake: I have made this cake recipe before and it can be found here: Chocolate Cake


If you are looking to make...

  • 1 dozen cupcakes: use the original recipe (bake for 18-20 minutes)
  • 1- 6” inch 2-tier cake: use original recipe (bake for 25-30 minutes)
  • 1- 6” inch 3-tier cake: multiply original recipe by 1.5 (bake for 25-30 minutes)
  • 1- 8” inch 2 tier cake: multiply recipe by two (bake for 35-40 minutes) 

Hershey’s Chocolate Icing:

Ingredients:

  • 1 stick unsalted butter (8 Tablespoons), melted
  • 2/3 cup unsweetened cocoa powder
  • 3 cups powdered sugar
  • 1/3 cup milk
  • 1 teaspoons vanilla extract
Directions:

In a medium sized bowl, beat melted butter and cocoa powder until smooth. Alternately add the powdered sugar and milk. Beat until smooth. Stir in vanilla extract. Makes around 2 cups. 


Source: Cake--Simply Recipes, Icing-- Hershey’s “Perfectly Chocolate” Icing

Thursday, August 30, 2012

Classic Vanilla Cupcakes for the upcoming Alabama game, Roll Tide!

Classic Vanilla Cupcakes
This month has been quite busy. We were all prepared to move, but found out about two weeks before we were supposed to leave that we would be staying in Kansas for a little while longer. After canceling the movers, calling our landlord to tell them we were staying, and dealing with many other things that arose from us not moving home anymore, we are finally settling back into our routine. August and September are normally big months for us anyway, since Russell’s birthday is in August and college football normally starts in September. I was planning on being in Alabama and having some of our friends and family over for the game but since that didn’t happen it will just be Russell, Jake and I.


Classic Vanilla Cupcakes 

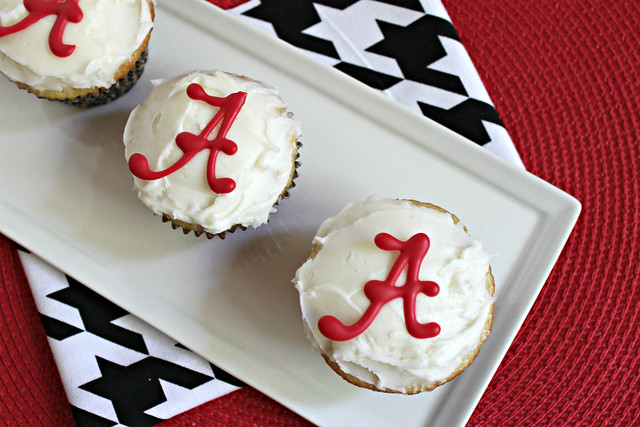
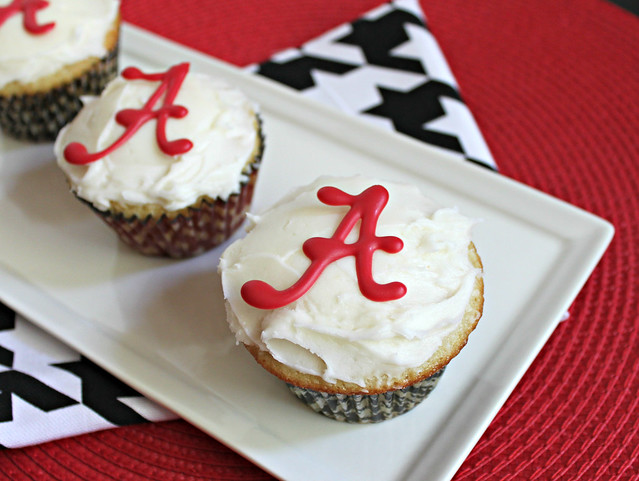
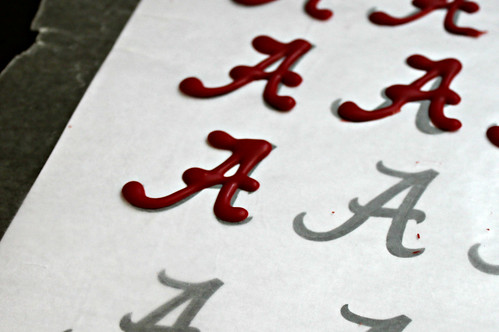
Although it will only be the three of us watching the game this weekend, I have already planned a wonderful menu full of football food. We will also be having these cupcakes. I have posted a vanilla cupcake recipe a while back but this is definitely my new favorite. I have made it several times since I first discovered it a few weeks ago. Since Alabama’s colors are white and crimson, I wanted to make a vanilla cupcake with white buttercream frosting. I found some adorable houndstooth cupcake liners and as an Alabama fan, I couldn’t pass them up! I also wanted to add a little something to decorate the cupcakes with. I thought the Alabama “A” would be great. I found one online, copied and pasted it about 12 times into a word document, and printed it. I then melted some red candy melts with a little bit of coconut oil. I placed the “A’s” that I printed out under some wax paper and traced the “A’s” with the melted red candy melts (I used a size 2 pipping tip). I think they turned out pretty well! Of course, these cupcakes are definitely customizable according to your to team loyalty.


Picture 1

While piping the icing always looks pretty, I decided to once again just use a knife to ice the cupcakes. Russell isn’t a big fan of icing so it works out well. I halved the vanilla buttercream icing that is below since I knew I wouldn’t need as much but if you do plan on pipping the icing, I would definitely make the entire batch. 


Vanilla Cupcakes with Vanilla Buttercream


Printer-Friendly Version

Cupcakes:

Ingredients:

  • 1 1/2 cups cake flour
  • 1 1/4 teaspoons baking powder
  • 1/2 teaspoon baking soda
  • 1/2 teaspoon salt
  • 2 eggs
  • 3/4 cup white sugar
  • 1 1/2 teaspoons vanilla extract
  • 1/2 cup canola oil
  • 1/2 cup buttermilk
Directions:

Preheat oven to 350 degrees F. Line a 12-cup muffin tin with cupcake liners. Spray with non-stick spray.


In a medium bowl, whisk together flour, baking powder, baking soda, and salt. Set aside.


In another medium sized bowl, beat eggs for approximately 30 seconds. Add sugar and beat for another 30 seconds. Beat in oil and vanilla extract.


Add half of the flour mixture to the sugar mixture and beat on low until just combined. Next add half of the buttermilk and once again beat on low until just combined. Use a spatula between each addition to scrape the sides of the bowl. Continue with the other half flour and then end with the rest of the buttermilk. 


Fill each muffin tin about 2/3 full. Bake for approximately 12-15 minutes. 


Allow to cool for 1 minute in the muffin tin. Then remove to a wire rack to continue cooling.


Once cupcakes have cooled ice with vanilla buttercream. 


Vanilla Buttercream


Ingredients:

  • 20 Tablespoons (2 1/2 sticks) unsalted butter, softened
  • 2 1/2 cups powdered sugar
  • 1/8 teaspoon salt
  • 2 teaspoons vanilla extract
  • 2 Tablespoons heavy cream
Directions:
Using a stand mixer fitted with the whisk attachment, beat butter at medium-high speed until smooth, about 20 seconds. Add powdered sugar and salt. Beat at medium-low speed until most of the sugar is moistened, about 45 seconds.

Scrape down the bowl and beat about 15 seconds at medium speed until the mixture is fully combines.


Scrape the bowl once again and add vanilla extract and heavy cream. Beat for about 10 seconds until incorporated.


Increase speed to medium-high speed and beat until light and fluffy. This will take about 4 minutes. Make sure to scrape the bowl once or twice during this time.


Source: 
Cupcakes-- Glorious TreatsButtercream-- Originally from Cooks Illustrated, 2007 as seen on The Way the Cookie Crumbles

Tuesday, July 10, 2012

Mocha Cupcakes

Peach Crumble

Last week was quite busy! On Monday I went to a cupcake party, Wednesday was the 4th of July so we went over to a friend’s house to celebrate, Thursday I went to another BBQ, and Friday I had to say goodbye to one of my good friends that is moving. The cupcake party was a ton of fun...since I am trying to cut back on my sugar intake I managed to only eat half of a cupcake. Most would consider that a travesty but I considered it a victory since there were  11 varieties of cupcakes there! 

Peach Crumble

I wanted to make these cupcakes to take to the cupcake party but the first chocolate cupcake recipe I tried wasn’t what I was looking for--so I ended up making some different cupcakes to take (no worries, they will be on the blog soon!). When we made our plans for the 4th of July I wanted to bring something--I thought cupcakes were always a welcome treat! I tried a different chocolate cupcake recipe that was exactly what I was looking for and they baked up perfectly!

These were a big hit and our friends loved them. I decided to lightly frost the cupcakes so there wouldn’t be quite as much icing as there is with pipping. Either way these are a crowd pleaser!
Cupcake Ingredients: 
  • 1 1/2 cups flour
  • 1/4 cup unsweetened cocoa powder
  • 1 cup white sugar
  • 1 teaspoon baking soda
  • 1 cup brewed coffee 
  • 1 Tablespoon white vinegar
  • 2 teaspoons vanilla extract
  • 6 Tablespoons vegetable oil
Frosting Ingredients*:
  • 1 stick (8 Tablespoons) unsalted butter, slightly softened
  • 2/3 teaspoons vanilla extract
  • 2/3 pound powdered sugar (about 2 1/2 - 3 cups)
  • 2 teaspoons unsweetened cocoa powder
  • 1 teaspoon espresso granules, dissolved in 1 teaspoon warm water
  • 1-2 Tablespoons heavy cream or milk
*I used a butter knife to ice my cupcakes which doesn’t use quite as much frosting. I had just the perfect amount. If you are going to pipe your frosting, you might want to increase this recipe by half or double it. 

Directions:


For the cupcakes: Preheat oven to 350 degrees F. Line a 12-cup muffin tin with paper liners and spray with non-stick spray, set aside.

In a large bowl, sift together the flour and cocoa powder, making sure there are no lumps remaining. Whisk in the sugar and baking soda. 

In a separate small bowl, mix together the brewed coffee, vinegar, vanilla extract, and oil.

Pour the wet ingredients into the dry and whisk until just combined. There may be a few lumps remaining which is okay. 

Fill cupcake liners about 2/3 of the way full. Bake for 18-20 minutes or until toothpick inserted in the middle of a cupcake comes out clean. Allow to cool in the pan for about 5 minutes.

Carefully remove the cupcakes from the pan to a wire rack to finish cooling.

For the frosting: In a medium bowl, sift together powdered sugar and cocoa powder, set aside.

Place the butter in the bowl of a stand mixer fitted with the whisk attachment. Whip on medium speed until butter is creamy and smooth. With mixer still on medium, slowly add the powdered sugar mixture. Whisk until well combined. 

Add salt, vanilla, 1 tablespoon heavy cream or milk, and espresso-water mixture. Whisk on low until incorporated. If needed, add another tablespoon of cream or milk. Beat on medium until icing is smooth and fluffy.

After cupcakes are cooled completely, ice with frosting. 

Source: Cupcakes--Simply Recipes, Icing--My Baking Addiction

Monday, February 28, 2011

Lemon Cornmeal Cake with Blueberry Topping

I have been able to get back into somewhat of a routine since Jake was born, but I am still having trouble finding time to get into the kitchen. During Jake’s naps would be the ideal time but there always seems to be other things that take priority in those precious, sometimes only 30 minutes long, moments of tranquility. This past weekend Jake (and Daddy) went down for a nap and I could tell they were going to be sleeping for a little while, so I decided to finally bake a cake. I mixed all the ingredients, placed the batter in the pan, and slid the pan into the oven. I snuck a taste of the batter and it left me wanting to wait by the oven until the cake was ready! As I was cleaning up I turned around and realized I had failed to include a crucial ingredient, the melted butter. I had left it sitting on the counter; I immediately realized the cake would not work out. I knew the batter was so scrumptious that I had to start over and try again. Believe me, it was worth the extra effort!

This cake is not overly sweet. It has a wonderful, but not overpowering, lemon flavor and the blueberry topping really brings everything together. I promise you will not be disappointed if you make this cake...just don’t forget the butter!

Ingredients:

Glaze:
  • 1 1/2 cups (packed) powdered sugar, sifted
  • 3 tablespoons fresh lemon juice

Cake:
  • 1 1/2 cups all-purpose flour
  • 1/3 cup yellow cornmeal
  • 3/4 cup sugar
  • 3 1/2 teaspoons baking powder
  • 1/2 teaspoon salt
  • 1 cup buttermilk *
  • 2 large eggs
  • 1 tablespoon finely grated lemon peel
  • 3/4 teaspoon vanilla extract
  • 1/2 cup (1 stick) unsalted butter, melted, cooled

*I didn’t have any buttermilk on hand so I used a buttermilk substitute. Add 1 tablespoon lemon juice (you can also use white vinegar) to a liquid measuring cup. Add milk until it equals 1 cup. Let sit for 5 minutes.

Blueberry Topping*:
  • 2 cups blueberries, fresh or frozen
  • 1/3 cup sugar
  • 1 1/2 teaspoon cornstarch
  • 1 tablespoon cold water
  • 1 tablespoon fresh lemon juice
* I choose to use a different blueberry topping than what the original recipe called for.


Directions:

Glaze:

Combine the powdered sugar and 2 tablespoons of the lemon juice. Stir to combine. If needed add more lemon juice 1/2 teaspoon at a time. You want the glaze to be somewhat thick but still spreadable. Set aside.

Cake:

Preheat oven to 350 degrees F. Butter or grease a 9-inch cake pan with 2 inch sides; line the bottom with parchment paper.

In a large bowl, combine flour, cornmeal, sugar, baking powder, and salt. Set aside.

In a separate medium sized bowl, combine buttermilk, eggs, vanilla, and grated lemon peel.

Pour buttermilk mixture and melted butter into the flour mixture. Using a spatula, fold mixture until blended--do not stir! Pour batter into pan and spread evenly.

Bake for approximately 25-30 minutes or until a toothpick inserted in the middle of the cake comes out clean and the sides of the cake begin to separate from the sides of the pan.

Remove cake from the oven and immediately run knife along the sides of the cake. Place a rack over the top of the pan. While holding the rack and the cake pan, invert cake to remove from pan. Place another rack on the bottom of the cake and invert once more so the cake is top side up.

Stir glaze until blended. Drop by the spoonful on top of hot cake; within 1/2 inch of the edge of the cake (some glaze may drip down the sides of the cake). Cool completely and serve with blueberry topping (recipe below).

Blueberry Topping:

In a medium, non reactive saucepan, add blueberries and sugar; heat until blueberries begin to release their juices. Combine the cornstarch with the cold water and lemon juice, until no lumps remain. Stir the slurry into the blueberries. Bring to a boil, then reduce to a simmer for 1 minute.

Serve warm or chilled. Can be stored for 3 days in the refrigerator.

Source: Cake originally from Bon Appetit Magazine, as seen on Amanda’s Cookin’, Blueberry Sauce originally adapted from The Perfect Scoop by David Lebovitz as seen on Annie’s Eats

Sunday, May 09, 2010

Sugar Cookies with Icing

I absolutely love sugar cookies and would choose a sugar cookie over any other type of cookie any day. I always see beautifully decorated sugar cookies and wanted to try my hand at them. Since I chose an icing that is sweet to decorate the sugar cookies with I did not want my cookies to be overly sweet. Instead I wanted them to have a slight sweetness yet wonderful flavor. After trying a few sugar cookie recipes I have definitely found the one I will continue to use from now on.

At first the idea of decorating sugar cookies can seem like a daunting task but I did everything over the course of 4 days. Now of course this time could easily be shortened but since this was my first time I decided to take my time. The first day I made the cookie dough and refrigerated it. The next day I rolled the dough out, cut it with cookie cutters, and baked the cookies. The third day I started decorating the cookies with icing. The fourth and final day I finished decorating the cookies with any icing detail work that could not be completed on day three.

Sugar Cookies:

Ingredients:
  • 4 1/2 cups all-purpose flour
  • 1 teaspoon baking powder
  • 1/2 teaspoon baking soda
  • 1/2 teaspoon salt
  • 1 cup butter, softened
  • 1 1/2 cups white sugar
  • 1 egg
  • 1 teaspoon vanilla extract
  • 1/2 cup sour cream
Directions:

Sift together flour, baking powder, baking soda, and salt; set aside.

In a large bowl, cream together butter and sugar until smooth. Beat in egg, vanilla, and sour cream until well combined.

Stir in sifted ingredients slowly.

Preheat oven to 325 degrees F. On a lightly floured surface, roll down out to 1/4 inch thickness. Cut into desired shapes with cookie cutters. Place cookies on ungreased cookie sheet space approximately 1 1/2 inches apart.

Bake for 10-15 minutes. Allow cookies to cool on baking sheet for 3-5 minutes before removing and placing on a wire rack to cool completely.

*I chose to refrigerate the cookie dough overnight to make rolling the dough easier.


Sugar Cookie Icing:

Ingredients:
  • 1 cup confectioners powdered sugar
  • 3 teaspoons milk
  • 3 teaspoons corn syrup
  • 1/4 teaspoon vanilla extract
Directions:

In a small bowl combine powdered sugar and milk until smooth. With a hand mixer, beat in corn syrup and vanilla extract. If icing is too thick add more corn syrup. Separate into bowls and add food coloring of your choice. Pipe or brush icing onto cooled cookies.


This is the modified version of the original recipe, I quadrupled this recipe to have enough icing for the amount of cookies I was decorating. Depending on the consistency you are looking for you might not need the full amounts of corn syrup and milk listed above so add it as you go. If your icing becomes too runny and you need it to be thicker add more powdered sugar.

Since Mother’s Day was soon approaching I decided to package and send the decorated cookies to my mom and my mother-in-law. I individually wrapped each one and tied a ribbon around the top. I then wrapped the cookies in tissue paper and boxed them up to be sent. I was very pleased with the overall turnout of the cookies and now that I have done this once I will surely do it again.

The picture below shows the finished product:


Here is a picture of the cookies with a note to my mom.


Here is a picture of the cookies all wrapped and ready to be boxed and sent.

Thursday, April 29, 2010

Vanilla Cupcakes with Vanilla Buttercream


Russell came home the other day and said everyone at work was going out to lunch for one of his coworker’s last day. His coworker that is leaving is a very sweet girl, so I decided to do something special and make homemade cupcakes and icing. They turned out wonderful! After reading all of the horror stories about what could go wrong making buttercream I admit I was a little nervous but it turned out amazing! I am so glad these cupcakes had a place to go other than our kitchen counter, let’s just say they wouldn’t have lasted long in the house with me!

Vanilla Cupcakes

Ingredients:
  • 1/2 cup unsalted butter, at room temperature
  • 2/3 cup sugar
  • 3 eggs
  • 1 teaspoon vanilla extract
  • 1 1/2 cups all-purpose flour
  • 1 1/2 teaspoon baking powder
  • 1/4 teaspoon salt
  • 1/4 cup milk
Directions:

Preheat oven to 350 degrees F. Line muffin tin with 12 muffin liners, set aside.

In a bowl cream the butter and sugar until light and fluffy. Add the eggs one at a time, scraping down the sides and beating well after each addition. Once all the eggs have been added, beat in the vanilla extract.

In a separate bowl, whisk together flour, baking powder and salt. With the mixer on low speed, alternately add the flour mixture and milk, in three additions. Begin and end with the flour mixture. Scrape down the sides of the bowl.

Evenly fill the muffin cups with the batter and bake approximately 18-20 minutes or until a toothpick inserted into the center of a cupcake comes out clean.

Remove from the oven and allow to cool in pan 3-5 minutes.

Transfer cupcakes to a wire rack and allow to cool completely. Prepare frosting (recipe for vanilla buttercream below) and decorate cooled cupcakes as you wish!


Vanilla Buttercream

Ingredients:
  • 20 tablespoons (2 1/2 sticks) unsalted butter, softened
  • 2 1/2 cups confectioners’ sugar, sifted
  • 1/8 teaspoon salt
  • 2 teaspoons vanilla extract
  • 2 tablespoons heavy cream
Directions:

Using a hand mixer (or stand mixer fitted with the whisk attachment), beat butter at medium-high speed until smooth, about 20 seconds. Add confectioners’ sugar and salt; beat at medium-low speed until most of the sugar is moistened, about 45 seconds.

Scrape down the bowl and beat about 15 seconds at medium speed until the mixture is fully combined.

Scrape bowl and add vanilla and heavy cream. Beat for about 10 seconds until incorporated.

Then increase the speed to medium-high and beat until light and fluffy. This will take about 4 minutes. Scrape down the bowl once or twice during this time.

Back to Top