Showing posts with label Main Dish. Show all posts

Sunday, October 07, 2012

The Perfect Traditional Chili

“Traditional

Everyone needs a traditional chili recipe to keep on hand. Similar to the baked potato soup I recently posted, I have made a few different chili recipes. I was actually close to giving up... but when Russell requested chili one day I began my search for the perfect traditional chili recipe and I have found it. This chili has the perfect amount of spice with a meat to bean ratio that is spot on. Allowing the chili to simmer for 3 hours helps to thicken things up while also enhancing the flavor.


“Traditional

I only made one batch of this chili since I wasn’t sure if this would be my "go-to” recipe.  Now that I know that is it, I will definitely double the recipe the next time I make it to have some leftover to freeze. Russell enjoyed his over basmati rice while I enjoyed mine over fries (chili cheese fries!). Any way you prefer it, this is the perfect traditional chili. The recipe does call for a 12 ounce bottle of beer and after doing some reading, I have come to the conclusion to just use whatever brand you enjoy or have on hand. The original recipe suggest using either black beans, red kidney beans, or pinto beans, I choose to use red kidney beans for a more traditional chili. 


Traditional Chili


Printer-Friendly Version


Ingredients:

  • 1.5-2 pounds ground beef
  • 1 large onion, finely diced
  • 3-4 cloves garlic, minced
  • 2- 15 ounce cans red kidney beans, drained and rinsed (you could also use black beans or pinto beans)
  • 24 ounces tomato sauce
  • 12 ounce bottle of beer
  • 6 ounce can tomato paste
  • 4.5 ounce can diced green chilies
  • 2 Tablespoons chili powder
  • 1 Tablespoon Worcestershire sauce
  • 1 Tablespoon cumin
  • 1-2 teaspoons cayenne pepper, depending on how spicy you would like your chili
  • 1 teaspoon paprika
  • 1-2 teaspoons hot sauce, depending on how spicy you would like your chili
Directions:
In a large soup pot or dutch oven, brown ground beef with onion and garlic over medium-high heat. Drain beef of excess grease, if necessary. Add the remaining ingredients to the pot. Bring to a boil and then reduce heat to medium-low. Allow chili to simmer for 3 hours or until thickened. Stir occasionally. 

Top with shredded cheese, green onions, or sour cream, if you would like. You can also serve chili over rice, fries, or even top your hotdog with it. 


Source: Originally adapted from the Southern Living Cookbook, as seen on Peace, Love, and French Fries

Sunday, September 30, 2012

Baked Potato Soup

Baked Potato Soup

Typically on Sunday mornings, while Russell is watching the college football recaps on ESPN (as if he didn’t watch all the games the day before), I will sit down and plan our menu for the next week. I find this really helpful and keeps me from worrying about what we are going to have for dinner each night during the week. I love adding homemade soups to our menu when the weather gets cooler! This baked potato soup is one of our favorites, and it took me several attempts to find a recipe that we really love. Other potato soups I tried were either too thick or too soupy; but like baby bear says--this soup was just right! :)

I baked the potatoes the night before and fried the bacon the morning we were to have this soup in order to cut down on the amount of time I was in the kitchen at dinnertime. As a result, the soup came together in less than 30 minutes. 

Baked Potato Soup


Printer-Friendly Version


Ingredients:
  • 4-5 medium to large baking potatoes
  • 2/3 cup flour
  • 6 cups 2% milk
  • 3/4 cup shredded cheddar cheese
  • 1 teaspoon salt
  • 1/2 teaspoon ground pepper
  • 1 cup sour cream
  • 1/2 cup chopped green onions (I omitted)
Toppings:
  • Bacon, cooked and crumbled 
  • Shredded cheddar cheese
  • Green onions, chopped
Directions:
Preheat the oven to 400 degrees F. Line a cookie sheet or large pan with aluminum foil. Pierce potatoes with a knife or fork. Place potatoes on pan and bake for 45 minutes to an hour or until potatoes are tender. After potatoes have cooled, peel and place them in a medium sized bowl. Coarsely mash potatoes and set aside.

In a large soup pot, add the flour. Over medium heat, slowly whisk in milk until smooth. While whisking often, cook over medium heat until thick, about 8 minutes. Add potatoes, cheese, salt, and pepper. Stir until cheese is melted. 

Stir in sour cream and green onions and cook on low until soup is heated through (do not boil). Serve topped with bacon, cheese, and green onions.


Source: Originally adapted from Cooking Light, as seen on Two Peas and Their Pod

Sunday, June 24, 2012

Summer Corn Chowder

Peach Crumble

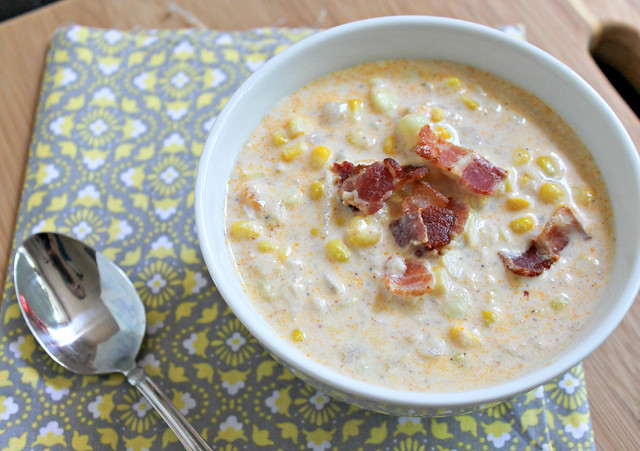
Being gone for two weeks can really throw you for a loop. After we got back from visiting home, it took me a few days to get back into the swing of things. Of course, we also arrived just in time for the temperatures to begin to rise. I don’t think it has been below 100 degrees F here all week, and the forecast for next week offers no relief. To say it is hot is an understatement.

Since it has been so hot the last thing I want to do is turn on the oven, so I have been looking for recipes that require only stove-top cooking. This summer corn chowder was perfect. I made a crab and corn chowder this past winter (which I plan on making again soon) and we loved it; as soon as I came across this recipe I knew I had to make it. Kansas has some wonderful sweet corn that makes this corn chowder heavenly. I paired it with a salad and it made for a great meal!

Also, a few housekeeping items--I hope you like the new design/layout! Up top you will find links to "about me” as well as a recipe index and how to contact me. I also started a Facebook page for my blog (I feel so late to the game), so if you’d like to follow me there, here’s the link: Southern Pink Lemonade on Facebook.


Ingredients:
  • 1 package bacon (about 12 slices) cooked and chopped, grease reserved
  • 1 medium onion, diced
  • 1 orange bell pepper, seeds removed and diced
  • 1 teaspoon thyme (I mistakenly omitted this and it was still great!)
  • 5 cups fresh corn kernels, I used the kernels from 5 ears of corn
  • 1/2 teaspoon adobo seasoning
  • 2 cups half-and-half
  • 2 cups chicken broth
  • 1 large potato, peeled and grated
  • salt and pepper
Directions:

Using about 3 tablespoons of the reserved bacon grease, saute onion and bell pepper for about 5 minutes or until they begin to soften. Add the corn and cook for 2 minutes.

Stir in the adobo seasoning, salt, and pepper. Add the chicken broth and half-and-half and bring to a boil.

Once boiling, add the grated potato. Reduce heat to medium, cover, and cook until potato is cooked through, about 10 minutes. After 10 minutes, check seasonings and adjust as necessary.

Serve with crumbled bacon on top.

Source: Originally from Fine Cooking, as seen on Baked Bree

Sunday, June 17, 2012

Roasted Tomatoes and Zucchini Quinoa with Balsamic Dressing

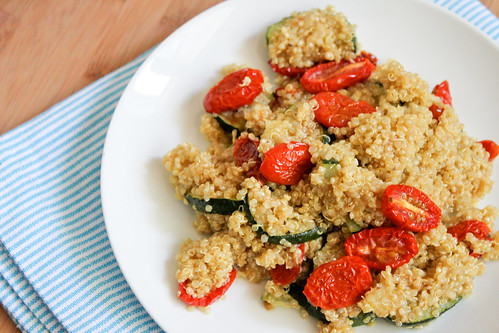
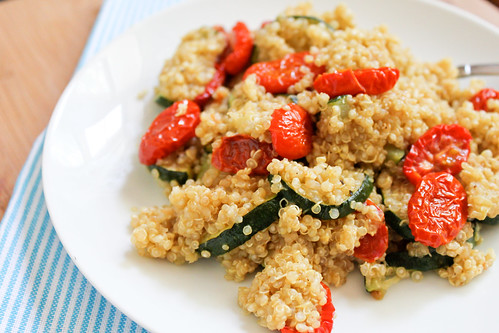
Roasted Zucchini and Tomato Quinoa with Balsamic Dressing

We just returned home from a two-week visit in Alabama. It was great to be back and visit with family. While planning for the trip, two-weeks seems like such a long time--but once the trip starts our time goes by so quickly! We managed to fit in: a weekend at my family’s lake house, a family reunion, a 1st birthday party, several trips to a couple of home improvement stores in preparation for when we move home in just a few months, and many visits with family and friends. Overall it was a wonderful trip and it made us even more excited to get back home.


The Lake

Picture taken by Russell out on the pier of my family’s lake house.

Just before we left I roasted some tomatoes and they were wonderful. I had to find another way to use them, other than snacking on them, so I roasted a zucchini then tossed it with quinoa and some of the roasted tomatoes. It still needed something else so I tried a balsamic dressing that tied all of the flavors together perfectly. This made the best lunch for a few days and Jake even loved it! While on our trip I could not stop thinking about those roasted tomatoes, and although we just got back a couple of days ago, I have already roasted more tomatoes in preparation to make this recipe again!

Roasted Zucchini and Tomato Quinoa with Balsamic Dressing 3

Printer-Friendly Version

Ingredients:
  • 1 cup uncooked quinoa
  • 2 cups chicken or vegetable broth
  • 1 zucchini, sliced
  • salt and pepper, to taste
  • 1/4 cup packed, roasted tomatoes
  • 3 Tablespoons Balsamic vinegar
  • 2 teaspoons olive oil
  • 1 teaspoon Dijon mustard
  • 1 teaspoon sugar
Directions:
Preheat oven to 400 degrees F. Line a baking sheet with parchment paper. Place slice zucchini on baking sheet and drizzle with olive oil. Sprinkle with salt and pepper. Roast for 10-15 minutes.

In a small saucepan place uncooked quinoa and chicken broth. Bring to a boil. Once boiling, cover and reduce to a simmer. Simmer for approximately 15 minutes. Remove from heat and allow to sit with the lid still on for 5 minutes.

While the quinoa is cooking, in a small bowl combine the balsamic vinegar, olive oil, dijon mustard, and sugar. Set aside.

Once quinoa and zucchini are done, place them in a medium sized bowl. Stir in roasted tomatoes. Drizzle dressing over quinoa and toss to combine. Serve warm. 

Adapted from: Zucchini, Tomato, and Quinoa Salad with Balsamic Dressing

Wednesday, May 30, 2012

Slow-Roasted Tomatoes

Slow-Roasted Tomatoes
One of my favorite things about warmer weather is all the fresh produce that comes with it. Since we move so often, I haven’t been able to have my own garden. Russell and I are moving once again in just a few short months and we plan to be in our new location for the long haul. We have already been planning our garden for next year, tomatoes, zucchini, cucumbers, peppers, the list goes on and on. In the meantime, we have been enjoying the fresh produce from the local farmer’s market. 

Slow-Roasted Tomatoes

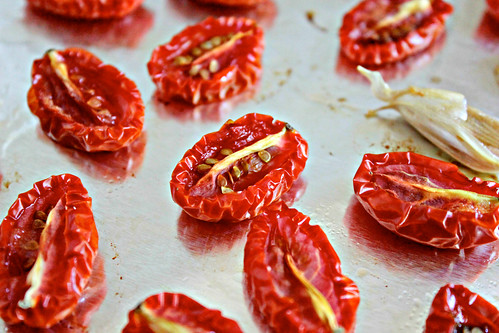
I have never been a big fan of sun-dried tomatoes. Most of the ones that you buy in the store are dry and leave me wishing they were more flavorful. After I picked up two containers of grape tomatoes, I began to wonder what I was going to do with them other than the obvious answer of eating them on a salad; finally I settled on roasting them. I’m not sure that I would really call this a recipe but instead more of a technique. Once I took them out of the oven I couldn’t help but try one and oh my goodness, they are truly a million times better than anything you buy in the store, they are irresistible. I had to summon all my will power to keep from eating these by the handful. 

I understand turning on your oven in the middle of the summer is probably the last thing you’d like to do, but believe me it is so worth it. Turn it on after the sun goes down and let them roast while you are relaxing on the couch--I promise you won’t be sorry. 

Printer-Friendly Version

Ingredients:
  • Cherry, grape, or roma tomatoes
  • Garlic cloves, unpeeled
  • Olive oil
Directions:
Preheat oven to 250 degrees F. Line a baking sheet with aluminum foil or parchment paper.

Halve each tomato and place on prepared baking sheet. Place garlic on baking sheet as well and lightly drizzle tomatoes and garlic with olive oil. 

Bake for approximately 2 and 1/2 hours or until tomatoes look dry and shriveled but still have a little juice on the inside remaining.

After tomatoes and garlic have cooled, transfer to an airtight container and drizzle with more olive oil to prevent them from drying out (I stored mine in a mason jar). Enjoy!
Source: Smitten Kitchen

Sunday, January 29, 2012

Broccoli Cheddar Soup

Broccoli and Cheddar Soup

Several years ago, before we got married, Russell lived in Oklahoma and suffered through the worst ice storm in years. A few years later, when we lived in Northern Virginia, we went through some of the worst snow storms in decades (our first experience shoveling snow). Jake spent his first week home from the hospital in a blizzard; in Georgia! In short, when we realized we would be facing a Kansas winter this year we weren’t too excited due to our history of carrying terrible weather with us. As soon as we moved to kansas we ordered a snow shovel and an ice chopper so we would be prepared for anything.

Luckily, this winter has been mild compared to most Kansas winters (knock on wood it stays that way!). I believe there has been one big snow storm so far, and that occurred while we were home for Christmas. Even though this winter had been mild, it has still been very cold--as in some days not getting above 20 degrees F cold. A few weeks ago there was sleet and light snow-- and when the weather gets colder, I want soup. I have been on a soup kick (more like obsessed with soup) and have been making a new soup about once a week. It is perfect for when it is cold and snowing and makes great leftovers.

Red birds in the snow
Red birds playing in the snow outside our window. Bailey really enjoyed watching them.

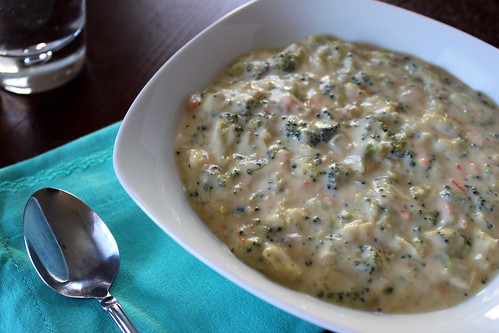
My sister sent me this recipe for broccoli cheddar soup and I could not wait to make it. We always send each other recipes and I can always count on her to send me something great--This soup was no exception. It is very similar to Panera’s broccoli and cheddar soup, but better. I think the best part of the soup is the broccoli, so I used two small heads of broccoli (about a pound) to make sure there was enough for each bite. Russell had his over white rice--while I preferred a crusty piece of French bread.


Ingredients:
  • 1/2 yellow onion, diced and sauteed
  • 1/4 cup butter (4 Tablespoons)
  • 1/4 cup flour
  • 2 cups half-and-half
  • 2 cups chicken stock
  • 1 lb. fresh broccoli, chopped into bite size pieces
  • 1 carrot, grated
  • 8 ounce block of mild cheddar cheese, shredded
  • salt and pepper to taste
Directions:

In a large pot, melt butter and whisk in flour. While constantly whisking, cook for 3-5 minutes. Add in the half-and-half.

Add the chicken stock and simmer for 20-25 minutes.

Next add the broccoli, grated carrot, and sauteed onion. Cook over low heat for another 20-25 minutes.

Season with salt and pepper to taste and then stir in shredded cheese. Cook until all cheese has melted. Serve over white rice or with crusty French bread.

Adapted from: Food.com

Sunday, January 08, 2012

Crab and Corn Chowder

IMG_3319
Russell and I have a beautiful kitty named Bailey. If you know me personally, you know that Bailey means the world to me. I always say that he is going to live until I am at least 70. We believe he is part Maine Coon and I am certain he is one of the softest kitties anywhere. Bailey has quite the personality, he greets new people at the door, carries his favorite toy (his green monkey) around with him everywhere, and loves to watch the birds. Most nights he sleeps with us at the end of the bed and greets us in the morning. He is truly one of the best cats.

Bailey1
Bailey as a kitten being mischievous

My sister and I adopted him while we were in college. Instead of selling pets, a local pet store adopted pets out from the local humane shelter. We got him when he was 9 weeks old and he had a rough first few days, so rough that we were told he might not make it. Luckily, being the strong-willed kitty that he is, he is still with us today.

Bailey 3Bailey 2
Bailey’s belly fur and Bailey with his green monkey (pictures taken with cell phone)

Branny over at Branny Boils Over is hosting a charity event called the SOUPer Bowl to help raise money for the ASPCA. I met Branny almost a year ago at BlogHer Food and in addition to being such a kind and genuine person, she is a true lover of furry friends (as my husband and I say). I am dedicating this crab and corn chowder to my favorite kitty Bailey for this Souper Bowl.

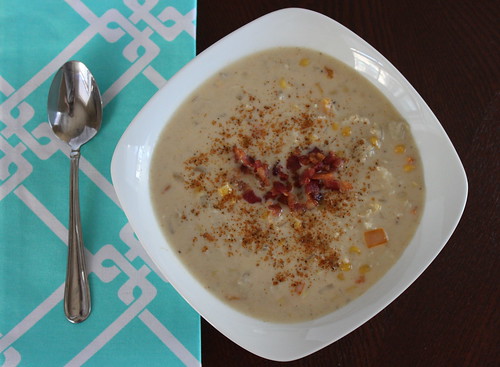
Whenever Russell and I go out for seafood the first thing I look for on the menu is crab. I think I could eat crab everyday and never get tired of it. When I first came across this recipe, I knew it would be wonderful. This crab and corn chowder is creamy, decadent, and so easy to make. It has the perfect amount of crab meat and the Old Bay seasoning is spot on. The corn at my grocery store did not look very good so I used frozen corn instead. The chowder still turned out great, but I can only imagine how wonderful it would be with fresh corn.


Ingredients:
  • 4-6 bacon slices, cooked and chopped, grease reserved
  • 1 orange bell pepper, diced
  • 1/2 yellow onion, diced
  • 4 cups chicken broth
  • 1/3 cup all-purpose flour
  • 3 cups fresh or frozen corn
  • 2 teaspoons Old Bay
  • 1/2 pound lump crab meat, picked free of any shells
  • 1 cup half and half
  • 1/4 teaspoon pepper
  • salt to taste
Directions:

Using the reserved bacon grease, in a large pot or dutch oven, saute the bell pepper and onion until tender.

Whisk together broth, Old Bay seasoning, and flour until smooth. Add to pot and stir in corn. Bring to a boil then reduce heat to a simmer for 30 minutes, stirring occasionally.

Stir in crab meat, half and half, salt, and pepper. Cook for an additional 3-5 minutes, until thoroughly heated. Serve with crumbled bacon on top. Sprinkle Old Bay on top, if desired.

Source: As seen on So Tasty, So Yummy, originally adapted by Our Share of the Harvest from Southern Living

“Soft kitty, warm kitty, little ball of fur. Happy kitty, sleepy kitty. Purr, purr, purr.” --The Big Bang Theory

Sunday, October 23, 2011

Chicken and Wild Rice Soup with Bacon

Chicken and Wild Rice Soup and Bacon 5

During the week things are pretty hectic. Russell tends to work late and something always seems to come up. Once Saturday finally arrives, Russell and I tend to take it easy. Most fall Saturday mornings consist of us getting up with the little one and lounging around until college football begins. These lazy Saturdays combined with cooler weather make me crave warm and comforting soup.

Chicken and Wild Rice Soup with Bacon 1

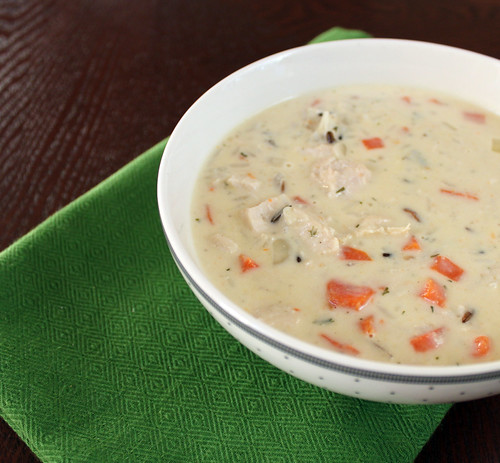
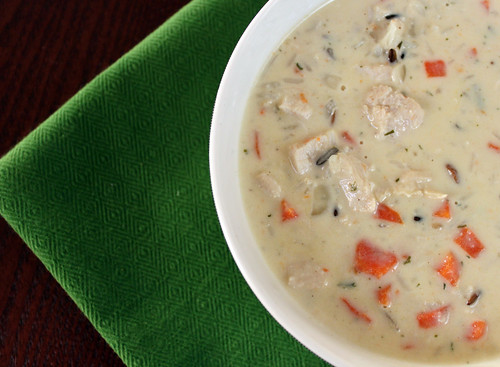
There are few things better than watching Alabama football while eating this chicken and wild rice soup with bacon! Out of all of the soups I have made so far this is one of my favorites. I had to stop myself from eating multiple bowls so we would have enough left over to enjoy it again on Sunday. Tender chicken, flavorful carrots, rice, and bacon in a creamy base makes this soup perfect!


Ingredients:
  • 3 strips of bacon, cooked and chopped, grease reserved
  • 1 small onion, chopped
  • 1 cup chopped carrots
  • 1/2 cup chopped celery (I omitted)
  • 2/3 cup wild rice, uncooked, rinsed and drained
  • 4 cups chicken stock
  • 1 cup heavy cream
  • 1 Tablespoon butter, melted
  • 1 Tablespoon flour
  • 1 teaspoon dried parsley
  • salt and pepper to taste
  • 2 chicken breasts, cooked and shredded
Directions:

Using the reserved grease from the bacon, saute the onions, celery, and carrots in a large stock pot until softened, about 5 minutes.

Add in the wild rice, chicken stock, chicken, and bacon and simmer for 25-30 minutes.

In a small bowl mix together butter, parsley, salt, pepper, and flour, stir in cream.

Slowly whisk cream mixture into the simmering soup. Allow to simmer on low for 10-15 minutes longer until thickened.

Source: The Beckville Church Cookbook via The Nest 

Sunday, October 16, 2011

Red Beans and Rice

Red Beans and Rice 3

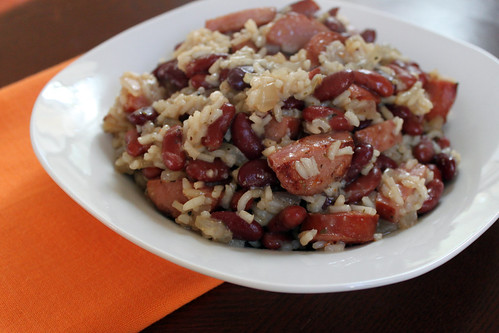
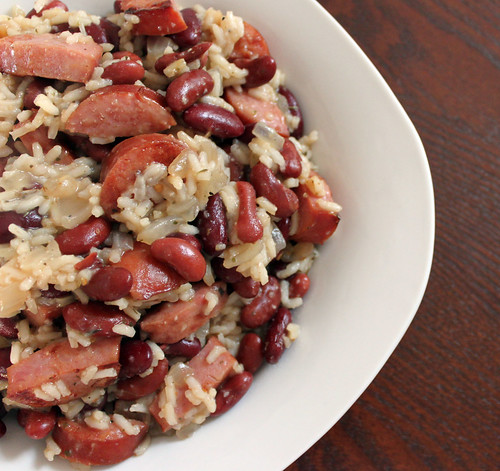
When Russell and I first got married we did not always eat the best. A lot of what we ate was pre-packaged and very processed. We still eat some of those items today, but what I have found is moderation is key. As I become more conscious of what we eat I have been trying to get back to the basics. Items that we previously ate from a box I am trying to make them from scratch. Red beans and rice is one of those items. I have always previously made red beans and rice from a box. While this was convenient, I am certain that "made from scratch" red beans and rice are much better not only health wise, in taste as well!

Red Beans and Rice 1

I have been searching for a red beans and rice recipe for a while now. I finally came across one last week that I knew would be a winner. Russell loves red beans and rice so as he took his first bite I anxiously waited for his reaction. He shook his head a few times in approval and finally stated it was wonderful--I was so relieved. Up until now Russell has been in love with creamy cajun pasta, he later proclaimed that red beans and rice was his new favorite meal. This dish is so simple to make, and for the most part is a one pot meal. The original recipe had the red beans and rice prepared separately with the red beans then served over the rice. I modified the recipe and cooked everything together. I think the flavors blend together well this way which yields a quite tasty final product.


Ingredients:
  • 1 pound of smoked sausage, sliced
  • 1 medium onion, chopped
  • 2 cloves of garlic, minced
  • 1 teaspoon Italian seasoning
  • 1/2 teaspoon crushed red pepper
  • 1/4 teaspoon of your favorite creole seasoning
  • 1/4 teaspoon pepper
  • 1- 15 ounce can light red kidney beans, drained and rinsed
  • 1- 15 ounce can dark red kidney beans, drained and rinsed
  • 3/4 cup uncooked white rice
  • 2 1/4 cups chicken broth
Directions:

In a large non-stick saute pan, brown sausage over medium heat. Once browned, transfer to a paper towel lined plate and set aside.

In the same large saute pan, add the onion and garlic, saute until tender. Stir in Italian seasonings, crushed red pepper, creole seasoning, and pepper, and cook for an additional 30 seconds.

Add beans, uncooked rice, and chicken broth. Bring to a boil. Reduce heat to a simmer, cover and cook for 15-20 minutes.

Remove from heat and allow to sit covered for five minutes. Fluff with fork and stir in browned sausage.

Wednesday, June 01, 2011

Black Bean Burgers

For Christmas last year I was given almost every small kitchen appliance any cook or baker dreams to own, including: a beautiful stainless steel Kitchen Aid stand mixer from Russell and my in-laws; an absolutely stunning red 12-cup Kitchen Aid food processor from my parents, sister, and brother-in-law; a mandolin slicer from my parents; and a Cuisinart electric cake/cookie decorator from my grandmother. Since then, I have used each of these items often and wonder what I ever did without them!

Admittedly, I was somewhat hesitant to use my food processor at first...I can’t really explain why-- I think it may have been the daunting idea of having to clean it afterwards. Once I discovered that just about every part of it is dishwasher safe, we became best of friends and I use it almost every day! I’ve made smoothies; chopped dried fruit; shredded cheese; and sliced, shredded, and chopped vegetables. The possibilities for the device seem endless, and I now look for recipes so that allow me to use it. After a weekend out of town and away from my kitchen, I was longing for a date with my food processor-- black bean burgers seemed like the perfect recipe to put it to work!

Russell arrived home from work one evening and immediately asked what we were eating for dinner. As soon as I responded with black bean burgers he (on cue) asked if they contained any meat. When I told him they did not, I could see his skepticism of my meal choice. The recipe makes 8 burgers and I was planning on freezing four of them to have for a later meal. However, my skeptical husband devoured four burgers all by himself--yes four! If that doesn’t let you know what a success they were, let’s just say I will be making them again soon. The outsides of the burgers develop a nice crispness, while inside they remain moist and flavorful. The lime sour cream (recipe found here) really compliments the flavors as well.


Ingredients:
  • 2- 14 ounce cans reduced sodium black beans, drained and rinsed well
  • 1 clove of garlic
  • 1/2 large yellow onion
  • 1/2 green or orange bell pepper (depending on your preference), seeds removed
  • 1 large carrot
  • 1 teaspoon smoked paprika
  • 1 teaspoon cumin
  • 1 teaspoon chili garlic sauce
  • 1 egg
  • 1/4 cup herbed bread crumbs
Directions:

Preheat oven to 350 degrees F and line a baking sheet with non-stick foil or parchment paper.

Add carrot, onion, garlic, and bell pepper to food processor and pulse until minced and well combined.*

In a medium bowl, mash black beans with a fork to make a paste. Add carrot mixture to the beans, as well as the remaining ingredients. Stir to combine.

Form mixture into 8 burger patties (they will be wet and sticky). Place on baking sheet and bake for 25-30 minutes or until edges begin to brown and are crispy.

Serve with avocado, tomato, lime sour cream, or any other desired toppings and enjoy!

*The original directions state to transfer the carrot mixture to a fine mesh strainer to remove any excess liquid but I accidentally skipped this step and did not have any issues with my burgers.

Source: Originally adapted from Good Things Catered, as seen on Cook Like a Champion: Black Bean Burgers

Wednesday, May 04, 2011

Black Beans and Rice

Russell’s Nanny (his grandmother) knows I love to cook, so when she comes across a great recipe she forwards it my way. When she sent me this recipe for black beans and rice I was pretty confident that Russell would enjoy it. I added it to my menu to try the following week. Since making this recipe the first time it has become part of my regular rotation of meals and has made an appearance on my menu several times. It is such a simple dish that comes together quickly and has great flavor. I have served it (at different times) with blackened chicken, smoked sausage, and without meat. The black beans alone make it a great meal when you don't have time to add chicken or sausage. Top with regular sour cream, lime sour cream (recipe below), or cilantro lime sour cream (recipe below) to really complete this dish!


Ingredients:
  • 2 tablespoons olive oil
  • 1/2 large onion, diced
  • 1 large green bell pepper, diced
  • 1 teaspoon chili powder
  • 3/4 cup uncooked white rice
  • 2 cups chicken broth
  • 15 ounce can of black beans, rinsed and drained
  • salt and pepper to taste
Directions:

In a medium saucepan, heat oil over medium high heat. Add diced onion and bell pepper. Saute until soft, approximately 6 to 7 minutes.

Stir in chili powder and season with salt and pepper to taste. Cook for another minute.

Stir in rice and beans and cover with chicken broth. Cover and reduce to a simmer. Cook for approximately 15-20 minutes, or until rice is tender, stirring occasionally.

Remove from heat and let stand for 5 minutes covered. Fluff and top with sour cream.

Lime Sour Cream/Cilantro Lime Sour Cream: Combine approximately 3 tablespoons sour cream with fresh squeezed lime juice and salt to taste. If you would like to make cilantro sour cream, add chopped cilantro to lime sour cream until desired taste is achieved.

Adapted from recipe received from Russell’s grandmother, original source unknown.

Sunday, May 01, 2011

Baked Salmon with Lemon Dill Butter

A couple of weeks ago Russell had a big promotion at work. I wanted to make a special meal for him to celebrate, but unfortunately the timing did not work out until now. Luckily Russell was excited about this meal, even though it was a little late. I really wanted to make something with fish or seafood. Our local grocery store had a great deal on salmon, and since I had recently come across a simple salmon recipe, I thought it would be perfect.

This dish involves very few ingredients - one of which is lemonade. I used "Simply Lemonade" since that is what I already had on hand, but your favorite brand lemonade will work. You can also use homemade lemonade. The lemonade gives the salmon a nice citrus flavor and also keeps it moist. It takes less than 5 minutes to prepare and no more than 20 minutes to bake. The salmon was so juicy and the lemon dill butter was a wonderful addition. Russell and I really enjoyed it and it made the perfect celebratory meal!


Ingredients:

Salmon:
  • 1 pound of Salmon, skin on
  • 1 cup (8 ounces) of Lemonade
  • Salt and Pepper

Lemon Dill Butter:
  • 4 tablespoons butter
  • 1/2 teaspoon dried dill
  • 1/4 teaspoon garlic powder
  • dash of salt (if using unsalted butter)
  • 1 - 1 1/2 teaspoons fresh squeezed lemon juice (I used 1 1/2 teaspoons, but I wanted a stronger lemon flavor)

Directions:

Preheat oven to 450 degrees F. Pour lemonade into a 9 x 13 inch baking dish. Season salmon with salt and pepper and place in lemonade.

Loosely cover with foil and bake for 15-20 minutes.

While salmon is baking, soften your butter. Stir in dill, garlic powder, lemon juice, and salt. Place in the refrigerator until ready to serve.

Once salmon is done, remove from oven and top with lemon dill butter.

Source: Salmon- Prevention RD: “Juice Box” Salmon, Lemon Dill Butter adapted from Real Restaurant Recipes

Tuesday, April 19, 2011

Ham and Cheese Sliders


*Enter to win a $25 gift-card to Penzeys Spices from Southern Pink Lemonade, click here for details! Giveaway ends Sunday, April 24th.


I have always been a ham and cheese kind of girl. As soon as I saw the recipe for these I knew I had to make them! These are easy to put together and are a perfect meal for any weeknight. They are irresistible and I found myself going back for one after another. There is something about the topping that combines with the sweetness of the honey ham and the Hawaiian rolls to create a perfect combination. I recommend using Hawaiian rolls if you are able to find them, if not you can also use slider rolls. This recipe can also be easily doubled for parties.


Printer-Friendly Version


Ingredients:


For the Sandwiches:

  • 12 Hawaiian rolls or slider rolls
  • 12 slices of honey ham
  • 12 small slices of Swiss cheese (I used 3 regular sized slices divided into 4 pieces each)
  • Mayonnaise


For the sauce:

  • 2 teaspoons Dijon mustard
  • 4 tablespoons butter, melted
  • 1 1/2 teaspoons dried minced onion
  • 1/4 teaspoon Worcestershire sauce
  • Poppy seeds, optional (I omitted)


Directions:


Preheat the oven to 350 degrees F. Split the Hawaiian rolls and spread each side with mayonnaise. Fold one slice of ham to fit on each roll and top with a slice of Swiss cheese. Put the tops back on each sandwich and place them on a baking sheet.


To make the sauce, add mustard, minced onion, and Worcestershire sauce to the melted butter. Whisk to combine. Using a spoon, drizzle the sauce over the sandwiches. If using poppy seeds, sprinkle over the sandwiches as well. Cover with foil and bake until cheese is melted, approximately 10 minutes. Remove foil and bake for an additional 2 minutes. Serve warm.


Slightly adapted from: Annie’s Eats: Ham and Cheese Sliders, originally adapted from The Girl Who Ate Everything: Ham and Cheese Sliders

Thursday, April 14, 2011

“Waldorf Style" Chicken Salad

I am very lucky because Russell will try anything once. He is always willing to try any of my crazy new recipes. But, at heart, he is a meat and potatoes kind of guy. With that in mind, I always put a lot of pressure on myself to prepare a hearty meal for dinner. I also tend to (unintentionally) categorize lighter meals as “only for lunch”. This is one of those recipes I had relegated to an “only for lunch” status. However, when Russell found out the chicken in the refrigerator was for chicken salad he was quite excited and asked me to make it for dinner that night. He loved it and so did I!

The apple adds a crispness that gives the chicken salad a great crunch, and the craisins add a little sweetness. You could also add halved grapes, pecans, or walnuts. We ate it on hawaiian rolls for dinner and the next day I ate some atop a salad with a mini croissant on the side. I think this chicken salad would also be great served on a croissant. Whichever way you choose to serve it I promise, it is delicious! Both Russell and I are both wishing I had doubled the recipe.

Printer-Friendly Version

Ingredients:
  • 2 1/2 cups cooked chicken breasts, diced
  • 1/2 cup mayonnaise
  • 2 tablespoons Greek yogurt
  • 2 teaspoons apple cider vinegar
  • 1 teaspoon sugar
  • 3-4 tablespoons craisins (dried, sweetened cranberries)
  • 1 apple, chopped
  • salt and pepper to taste

Directions:

In a medium sized bowl, combine mayonnaise, Greek yogurt, vinegar, sugar, salt, and pepper.

Add in chicken, apple, and craisins. Cover and refrigerate for at least 30 minutes to allow flavors to blend. Serve on Hawaiian rolls, croissants, or on top of mixed greens.

Wednesday, March 30, 2011

Lemon Garlic Tuna Burgers

I have never really liked tuna--tuna salad sandwiches, tuna noodle casserole, really anything containing canned tuna causes me to run far away. I honestly have no idea what made me bookmark this recipe; perhaps its simplicity, or maybe because it has lemon and garlic (two of my favorite ingredients). Whatever the reason I’m glad I gave it a try! These burgers were so delicious that Russell and I fought for the last burger and, after he lost, he asked me to make them again the very next night. I was a little worried about how these would hold together but they were absolutely perfect! We both found them perfectly moist on the inside with just the right amount of crispiness on the outside. I served them on toasted honey wheat sandwich thins topped with lemon sour cream (recipe below). I will definitely be making these again!


Ingredients:
  • 12 ounce can of tuna fish, drained and flaked
  • 1/2 cup panko bread crumbs
  • 1/4 cup finely chopped green onion
  • 3 teaspoons dried parsley
  • 2 cloves minced garlic
  • 1/4 teaspoon salt
  • 1/4 teaspoon pepper
  • juice of half a lemon
  • 3 tablespoons sour cream
  • 1 egg
  • 4 of your favorite honey wheat buns (I used honey wheat sandwich thins)
  • 1 tomato, sliced
  • lettuce or baby spinach, if desired

Directions:

Preheat oven to 400 degrees F.

Combine tuna, bread crumbs, onion, parsley, garlic, salt, pepper, lemon juice, sour cream, and egg in a medium bowl. Mix well and form into 4 patties.

Place patties on a greased baking sheet and bake for approximately 20 minutes.

Serve burgers on toasted honey wheat buns topped with lemon sour cream*, a tomato slice and lettuce or baby spinach. Enjoy!

*To make lemon sour cream, combine approximately 3 tablespoons of sour cream with fresh squeezed lemon juice and salt to taste. This is a great compliment to the flavors in the tuna burgers.

Back to Top