Showing posts with label Appetizers. Show all posts

Sunday, October 28, 2012

Fall Brunch

pumpkin-invitation
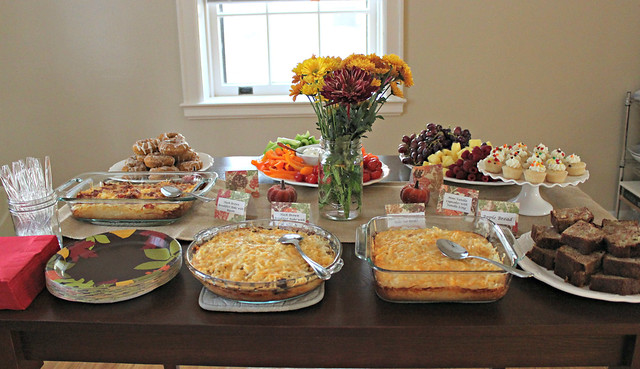
Last week I invited a few friends over for a fall brunch to celebrate the fall season. There were some last minute kinks that came up but in the end everything came together great!

IMG_8013

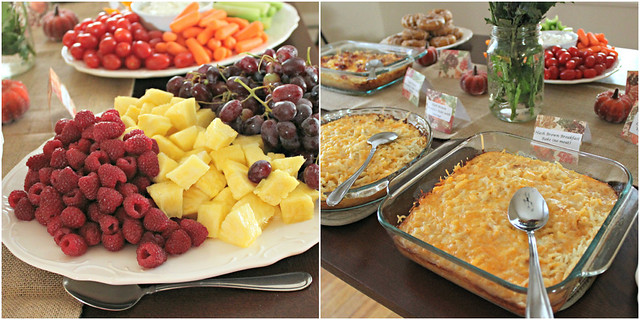
I wanted the menu to have an autumn feel so I served some of my favorite seasonal foods:
PicMonkey Collage4

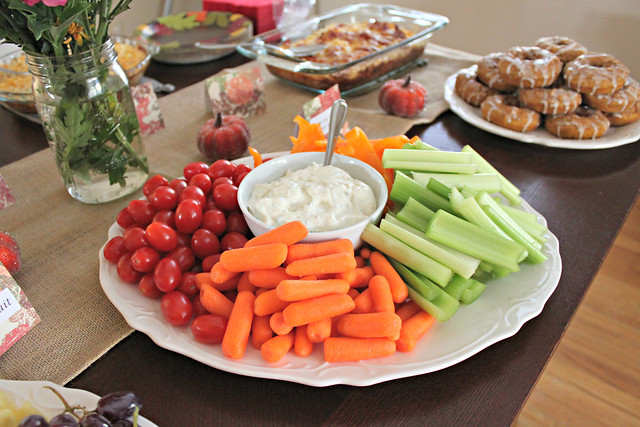
I decided against serving banana muffins and replaced them on the menu with the fresh vegetables instead. I already had apple bread and baked doughnuts planned and the fresh vegetables helped “lighten up” things.

IMG_8033

I also had a coffee bar available--complete with some cute disposable coffee cups that fit perfectly with the theme. We used a Keurig coffee maker so everyone brewed their favorite blend and then picked through the options at the coffee bar:
  • Pumpkin spice syrup (recipe coming soon)
  • Creamer
  • Sugar
  • Splenda
  • Fresh whipped cream
IMG_8064
I also had another drink station set-up that had water, orange juice, and sparkling grape juice. I printed out a fall themed picture and found a somewhat rustic frame to put it in. I wasn’t able to get a photo of all the decor together, but in the bottom right corner of this photo shows the framed print. 
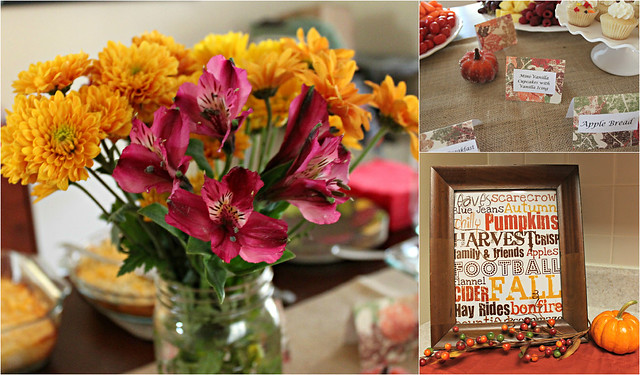
PicMonkey Collage1

Overall, everything went great. Planning ahead definitely helped! Everyone had a great time and I can’t wait until next fall to host another one! :)

Burlap table runner: Straight Stitch
Pumpkin invitation: Honey Print
Fall print: Antsi-Pants

Sunday, October 07, 2012

The Perfect Traditional Chili

“Traditional

Everyone needs a traditional chili recipe to keep on hand. Similar to the baked potato soup I recently posted, I have made a few different chili recipes. I was actually close to giving up... but when Russell requested chili one day I began my search for the perfect traditional chili recipe and I have found it. This chili has the perfect amount of spice with a meat to bean ratio that is spot on. Allowing the chili to simmer for 3 hours helps to thicken things up while also enhancing the flavor.


“Traditional

I only made one batch of this chili since I wasn’t sure if this would be my "go-to” recipe.  Now that I know that is it, I will definitely double the recipe the next time I make it to have some leftover to freeze. Russell enjoyed his over basmati rice while I enjoyed mine over fries (chili cheese fries!). Any way you prefer it, this is the perfect traditional chili. The recipe does call for a 12 ounce bottle of beer and after doing some reading, I have come to the conclusion to just use whatever brand you enjoy or have on hand. The original recipe suggest using either black beans, red kidney beans, or pinto beans, I choose to use red kidney beans for a more traditional chili. 


Traditional Chili


Printer-Friendly Version


Ingredients:

  • 1.5-2 pounds ground beef
  • 1 large onion, finely diced
  • 3-4 cloves garlic, minced
  • 2- 15 ounce cans red kidney beans, drained and rinsed (you could also use black beans or pinto beans)
  • 24 ounces tomato sauce
  • 12 ounce bottle of beer
  • 6 ounce can tomato paste
  • 4.5 ounce can diced green chilies
  • 2 Tablespoons chili powder
  • 1 Tablespoon Worcestershire sauce
  • 1 Tablespoon cumin
  • 1-2 teaspoons cayenne pepper, depending on how spicy you would like your chili
  • 1 teaspoon paprika
  • 1-2 teaspoons hot sauce, depending on how spicy you would like your chili
Directions:
In a large soup pot or dutch oven, brown ground beef with onion and garlic over medium-high heat. Drain beef of excess grease, if necessary. Add the remaining ingredients to the pot. Bring to a boil and then reduce heat to medium-low. Allow chili to simmer for 3 hours or until thickened. Stir occasionally. 

Top with shredded cheese, green onions, or sour cream, if you would like. You can also serve chili over rice, fries, or even top your hotdog with it. 


Source: Originally adapted from the Southern Living Cookbook, as seen on Peace, Love, and French Fries

Sunday, September 30, 2012

Baked Potato Soup

Baked Potato Soup

Typically on Sunday mornings, while Russell is watching the college football recaps on ESPN (as if he didn’t watch all the games the day before), I will sit down and plan our menu for the next week. I find this really helpful and keeps me from worrying about what we are going to have for dinner each night during the week. I love adding homemade soups to our menu when the weather gets cooler! This baked potato soup is one of our favorites, and it took me several attempts to find a recipe that we really love. Other potato soups I tried were either too thick or too soupy; but like baby bear says--this soup was just right! :)

I baked the potatoes the night before and fried the bacon the morning we were to have this soup in order to cut down on the amount of time I was in the kitchen at dinnertime. As a result, the soup came together in less than 30 minutes. 

Baked Potato Soup


Printer-Friendly Version


Ingredients:
  • 4-5 medium to large baking potatoes
  • 2/3 cup flour
  • 6 cups 2% milk
  • 3/4 cup shredded cheddar cheese
  • 1 teaspoon salt
  • 1/2 teaspoon ground pepper
  • 1 cup sour cream
  • 1/2 cup chopped green onions (I omitted)
Toppings:
  • Bacon, cooked and crumbled 
  • Shredded cheddar cheese
  • Green onions, chopped
Directions:
Preheat the oven to 400 degrees F. Line a cookie sheet or large pan with aluminum foil. Pierce potatoes with a knife or fork. Place potatoes on pan and bake for 45 minutes to an hour or until potatoes are tender. After potatoes have cooled, peel and place them in a medium sized bowl. Coarsely mash potatoes and set aside.

In a large soup pot, add the flour. Over medium heat, slowly whisk in milk until smooth. While whisking often, cook over medium heat until thick, about 8 minutes. Add potatoes, cheese, salt, and pepper. Stir until cheese is melted. 

Stir in sour cream and green onions and cook on low until soup is heated through (do not boil). Serve topped with bacon, cheese, and green onions.


Source: Originally adapted from Cooking Light, as seen on Two Peas and Their Pod

Sunday, September 23, 2012

Cheesy Mexican Corn Dip

“Cheesy

Now that football season is in full swing, I plan on making several appetizers throughout the day on Saturdays. For the first Saturday of the season I made a cheesy mexican corn dip as well as a crab dip. 

This cheesy Mexican corn dip is perfect for snacking on during football games. I halved the recipe below thinking that Russell and I certainly didn’t need a full recipe, I was wrong. We loved this dip and I really wish I had made more. No worries though, the next time I make it, I will definitely be making the full recipe. The sweet corn with the spicy peppers creates a wonderful flavor combination!


Cheesy Mexican Corn Dip

This recipe calls for 2 tablespoons of chipotle peppers in adobe sauce. The only can of chipotle peppers in adobe sauce that I found was huge, so I froze each pepper individually on a cookie sheet and then packaged them in a Ziploc bag to save for later. I cut out as many seeds from the peppers as possible, but the dip was still somewhat spicy. Admittedly, I do not like too much hea
t and I would recommend only using one pepper (without seeds) for the full recipe.

Cheesy Mexican Corn Dip

Cheesy Mexican Corn Dip


Printer-Friendly Version

Ingredients:

  • 2 cups shredded mild cheddar cheese
  • 1 cup shredded Monterey Jack cheese
  • 2 Tablespoons chipotle peppers in adobo sauce, minced
  • 1 (4 ounce) can diced green chilies
  • 1/2 cup mayonnaise
  • 1/4 teaspoon garlic powder
  • 1 1/2 cups fresh or frozen corn kernels
  • 1 small tomato, seeded and diced
  • 2 Tablespoons cilantro, chopped
  • 1 green green onion, chopped (optional)
Directions:
Preheat oven to 350 degrees F. Lightly grease an 8-inch baking dish. 

In a medium bowl, combine cheeses, chipotle peppers, green chilies, mayonnaise, garlic powder, and corn. 


Spread into 8-inch baking dish and bake for approximately 20 minutes or until cheese is golden and bubbly.


Top with diced tomato, cilantro, and green onion, if using. Serve warm with tortilla chips. 


Source: Originally adapted from: Gina Marie’s Kitchen, as seen on: Kitchen Simplicity

Sunday, June 24, 2012

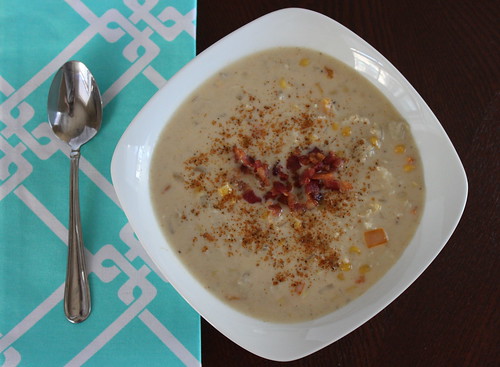
Summer Corn Chowder

Peach Crumble

Being gone for two weeks can really throw you for a loop. After we got back from visiting home, it took me a few days to get back into the swing of things. Of course, we also arrived just in time for the temperatures to begin to rise. I don’t think it has been below 100 degrees F here all week, and the forecast for next week offers no relief. To say it is hot is an understatement.

Since it has been so hot the last thing I want to do is turn on the oven, so I have been looking for recipes that require only stove-top cooking. This summer corn chowder was perfect. I made a crab and corn chowder this past winter (which I plan on making again soon) and we loved it; as soon as I came across this recipe I knew I had to make it. Kansas has some wonderful sweet corn that makes this corn chowder heavenly. I paired it with a salad and it made for a great meal!

Also, a few housekeeping items--I hope you like the new design/layout! Up top you will find links to "about me” as well as a recipe index and how to contact me. I also started a Facebook page for my blog (I feel so late to the game), so if you’d like to follow me there, here’s the link: Southern Pink Lemonade on Facebook.


Ingredients:
  • 1 package bacon (about 12 slices) cooked and chopped, grease reserved
  • 1 medium onion, diced
  • 1 orange bell pepper, seeds removed and diced
  • 1 teaspoon thyme (I mistakenly omitted this and it was still great!)
  • 5 cups fresh corn kernels, I used the kernels from 5 ears of corn
  • 1/2 teaspoon adobo seasoning
  • 2 cups half-and-half
  • 2 cups chicken broth
  • 1 large potato, peeled and grated
  • salt and pepper
Directions:

Using about 3 tablespoons of the reserved bacon grease, saute onion and bell pepper for about 5 minutes or until they begin to soften. Add the corn and cook for 2 minutes.

Stir in the adobo seasoning, salt, and pepper. Add the chicken broth and half-and-half and bring to a boil.

Once boiling, add the grated potato. Reduce heat to medium, cover, and cook until potato is cooked through, about 10 minutes. After 10 minutes, check seasonings and adjust as necessary.

Serve with crumbled bacon on top.

Source: Originally from Fine Cooking, as seen on Baked Bree

Wednesday, May 30, 2012

Slow-Roasted Tomatoes

Slow-Roasted Tomatoes
One of my favorite things about warmer weather is all the fresh produce that comes with it. Since we move so often, I haven’t been able to have my own garden. Russell and I are moving once again in just a few short months and we plan to be in our new location for the long haul. We have already been planning our garden for next year, tomatoes, zucchini, cucumbers, peppers, the list goes on and on. In the meantime, we have been enjoying the fresh produce from the local farmer’s market. 

Slow-Roasted Tomatoes

I have never been a big fan of sun-dried tomatoes. Most of the ones that you buy in the store are dry and leave me wishing they were more flavorful. After I picked up two containers of grape tomatoes, I began to wonder what I was going to do with them other than the obvious answer of eating them on a salad; finally I settled on roasting them. I’m not sure that I would really call this a recipe but instead more of a technique. Once I took them out of the oven I couldn’t help but try one and oh my goodness, they are truly a million times better than anything you buy in the store, they are irresistible. I had to summon all my will power to keep from eating these by the handful. 

I understand turning on your oven in the middle of the summer is probably the last thing you’d like to do, but believe me it is so worth it. Turn it on after the sun goes down and let them roast while you are relaxing on the couch--I promise you won’t be sorry. 

Printer-Friendly Version

Ingredients:
  • Cherry, grape, or roma tomatoes
  • Garlic cloves, unpeeled
  • Olive oil
Directions:
Preheat oven to 250 degrees F. Line a baking sheet with aluminum foil or parchment paper.

Halve each tomato and place on prepared baking sheet. Place garlic on baking sheet as well and lightly drizzle tomatoes and garlic with olive oil. 

Bake for approximately 2 and 1/2 hours or until tomatoes look dry and shriveled but still have a little juice on the inside remaining.

After tomatoes and garlic have cooled, transfer to an airtight container and drizzle with more olive oil to prevent them from drying out (I stored mine in a mason jar). Enjoy!
Source: Smitten Kitchen

Sunday, May 06, 2012

Baked Portobello Fries with Lemon-Garlic "Aioli"

Apple Cinnamon Baked Cake Doughnuts

When I was around 10 years old, we were quickly running out of room in our current house so my parents began house hunting. They found a lovely house that was up for sale due to the previous owner’s pending divorce. Since this couple was in quite the hurry to get everything settled, they had the house listed at a great price. My parents could not pass up such a great deal and we ended up moving in a couple months later. Other than the great deal that they got on this house, there was another contributing factor that helped solidify my parent’s decision. My grandmother (my dad’s mom) lived next door. I know, you are probably thinking of Everybody Love’s Raymond but really, it was different-- it was great!

Since my grandmother was right next door, we often shared dinners together or my mom would have my dad take her a plate. Unfortunately my Nanny has an intolerance to garlic which has resulted in my mom omitting it in just about everything she makes. It wasn’t until I went away to college that I discovered my love of garlic. Now I can’t imagine cooking without it.


Mushroom 1

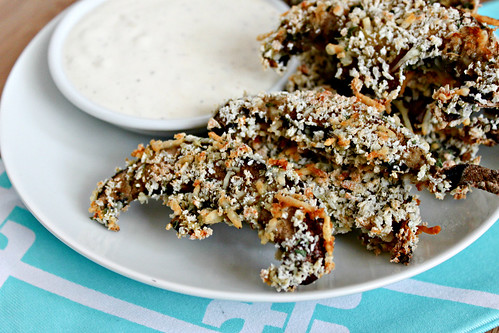
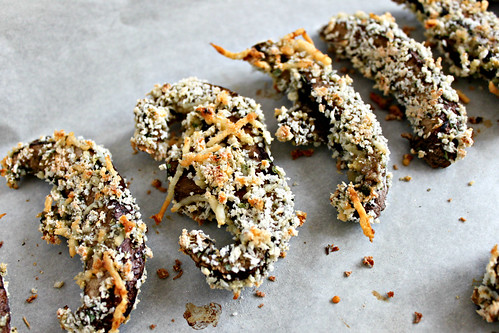
These baked portobello fries are better than anything you can order at a restaurant. Besides the fact that these are baked and not fried, the panko coating gives them a nice crunchy, airy texture and the mushrooms themselves are nice and juicy. While the mushrooms are great, the lemon-garlic aioli is what really makes these portobello fries amazing. The roasted garlic flavor added to the citrusy lemon makes for a wonderful combination. Dip your portobello fries in this aioli and you will find yourself unable to stop!

Printer-Friendly Version

Ingredients: 
  • 2-3 portobello mushrooms, "gills" removed, and sliced 1/4-1/2 inch thick*
  • 1/2 cup panko bread crumbs
  • 2 Tablespoons flour
  • 1/2 teaspoon dried oregano
  • 1/2 teaspoon dried parsley
  • 2 Tablespoons freshly grated parmesan
  • 1/4 teaspoon salt
  • 1/4 teaspoon pepper
  • 1 egg
*I saved myself a little bit of time and bought pre-sliced portobello mushrooms since they were on sale at the grocery store. If using whole portobellos, you want to make sure you slice them 1/4-1/2 thick. 

Lemon-Garlic "Aioli"
  • 1/4 cup mayonnaise
  • juice of 1/2 lemon
  • 2 garlic cloves, roasted and crushed (or finely minced)
  • salt and pepper to taste
Directions:

Preheat oven to 425 degrees F. Line a baking pan, such as a cookie sheet, with parchment paper or a silicone baking mat.

In small bowl, beat the egg.

On a plate, combine the panko, flour, oregano, parsley, parmesan cheese, salt and pepper.

One by one, dip the mushroom slices in the egg and then thoroughly coat each one with the panko mixture. Place the mushrooms slices on the prepared baking pan in a single layer and bake 10-15 minutes, turning the slices over half-way through to ensure even browning. 

Lemon-Garlic "Aioli": In a small bowl, combine the mayonnaise, lemon juice, and garlic. Season with salt and pepper to taste. Refrigerate 30 minutes prior to eating, to allow flavors to blend. 

Adapted from: A Cozy Kitchen and Kitchen Goddess

Sunday, April 29, 2012

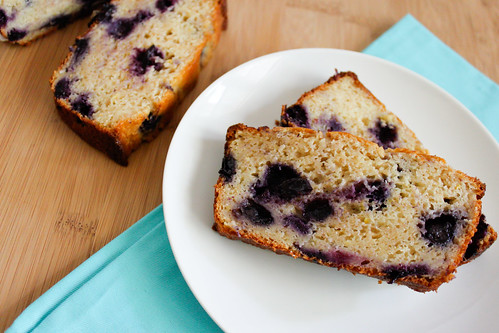
Blueberry-Lemon Yogurt Loaf

Blueberry-Lemon Yogurt Loaf

The last few weeks have been quite busy around here. Two weekends in a row we were out of town and as soon as we got back I got sick. Unfortunately, this resulted in little time in the kitchen but I am happy to say (and I’m sure Russell is as well) that I am finally feeling better.  I am also getting back into a normal routine when it comes to cooking. One of the weekends we spent out of town, we went to Kansas City. After asking a few friends for suggestions on places to go, one suggested the T-Rex Cafe. It is a dinosaur themed restaurant that is a ton of fun.

“Dinosaur

As soon as you walk in, there is a very large T-Rex that is basically staring you in the face--it moves and roars. Jake really didn’t have a reaction other than staring at it. But Russell and I thought it was pretty awesome. No matter where you are seated, there are dinosaurs all around. The atmosphere was great. Every so often the lights would flicker and the dinosaur’s heads would move and they would make a lot of noise. Every time Jake would just turn around and look at them. :) Our table was next to the Apatosaurus dinosaurs.

2012-04-06 11.59.06

On the other side of the restaurant they had an ice age type exhibit, a wooly mammoth, and a very large fish tank. Jake enjoyed looking as all of these. I had been told by a few people before we went that we definitely needed to go for the experience and not for the food. They were right. We had a great time checking out all of the dinosaurs...the food was not anything memorable. I told Russell I wouldn’t mind going back though since Jake had a great time. Inside the restaurant they had a Build-a-Dino (Build-a-Bear) station where you could pick out a dinosaur to build. We choose to get Jake a wooly mammoth and named him Wooly.

Blueberry-Lemon Yogurt Loaf

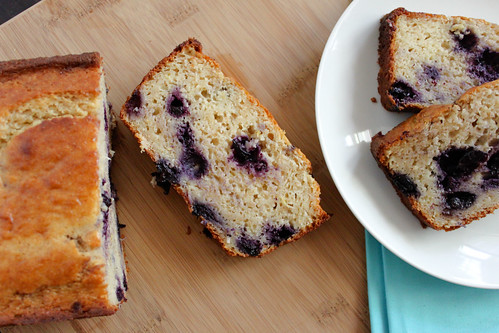
Now back to the blueberry-lemon yogurt loaf. I have had this recipe saved for awhile but just got around to making it. I love banana bread and apple bread but I wanted something a little different. This blueberry-lemon loaf definitely hit the spot. I changed a few things in an attempt to make it a somewhat healthier. I substituted part of the all-purpose flour for whole wheat flour and some of the oil for unsweetened applesauce. Also, since Russell doesn’t like things too sweet, I left off the glaze. I’m sure it would have been great with it, but since we were enjoying it as a mid-morning breakfast we really didn’t miss it. Overall I really enjoyed the blueberry and lemon combination.

Printer-Friendly Version 

Ingredients:
  • 1 cup all-purpose flour
  • 1/2 cup whole wheat flour (can substitute all-purpose flour)
  • 2 teaspoons baking powder
  • 1/2 teaspoon salt
  • 1 cup whole-milk yogurt (I used Fage 2% Greek yogurt)
  • 1 cup sugar
  • 3 eggs
  • 1 large lemon, zested
  • 1/2 teaspoon vanilla extract
  • 1/4 cup canola oil
  • 1/4 cup unsweetened applesauce
  • 1 1/2 cups blueberries, fresh or frozen
For the lemon glaze (optional):
  • 2 to 3 Tablespoons fresh lemon juice
  • 1 cup powdered sugar
Directions:

Preheat oven to 350 degrees F. Grease a 9x5 loaf pan with non-stick spray.

In a small bowl, sift together flour, baking powder, and salt. Set aside.

In a medium bowl, combine yogurt, sugar, eggs, lemon zest, vanilla extract, oil, and applesauce. Slowly add the dry ingredients to the wet ingredients and stir until just combined. Gently fold in the blueberries.

Pour batter into greased loaf pan. Bake for 50-55 minutes or until toothpick inserted into center of loaf comes out with minimal moist crumbs.

Remove loaf pan from oven and place on a wire rack. Allow loaf to cool in pan on wire rack for 10 minutes. After 10 minutes, carefully remove the loaf from the pan and place on wire rack. Let cool completely.

For Lemon Glaze: Place powdered sugar in a small bowl, add 2 tablespoons lemon juice and stir. If icing is too thick add more lemon juice, 1 teaspoon at a time, until desired consistency. Drizzle over cooled loaf.


Slightly adapted from: Sweet Pea’s Kitchen

Thursday, February 02, 2012

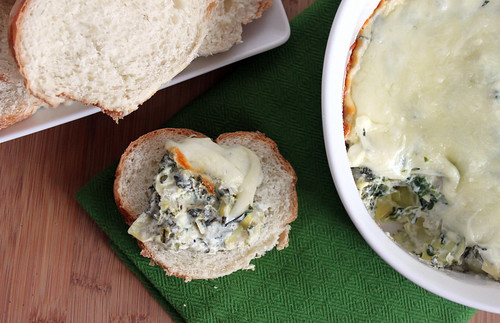
Spinach and Artichoke Dip

IMG_3644_1

During the Fall, Saturdays are reserved for college football, specifically Alabama football. I have described our ritual a few times before and, even since Jake was born, not much has changed. Russell wakes up early to watch College Game Day on ESPN and I begin making a few appetizers for us to munch on throughout the day. Russell and I have never been big professional football fans but we always watch the Superbowl. Other than the commercials and the game itself, the best part of the Superbowl is the food that comes along with it. The Superbowl is the last hurrah of football season and I always indulge. This spinach and artichoke dip is perfect for any gathering and would be great at a Superbowl party. This dip comes together quick and is creamy, cheesy and leaves you wanting more! This dip can also be mixed together ahead of time, refrigerated, and then baked when you are ready.

Also, my post on Molten Chocolate Cakes has been entered in a Valentine’s Day contest called “My Gourmet Valentine” through Velvet Aroma. If you would like to, you can vote here (you do not have to register to vote). Thank you! :)


Ingredients:
  • 1- 8 ounce package cream cheese
  • 1/4 cup mayonnaise
  • 1/2 cup shredded Italian cheese blend
  • 2 cloves garlic, minced
  • 1/2 teaspoon dried basil
  • 1/4 teaspoon salt
  • 1/4 teaspoon pepper
  • 1- 14 ounce can artichoke hearts, drained and chopped
  • 10 ounce package frozen spinach, thawed and drained
  • 1/4 cup shredded mozzarella cheese
Directions:

Preheat oven to 350 degrees F.

In a medium bowl, combine cream cheese, mayonnaise, Italian cheese blend, garlic, basil, salt, and pepper.

Gently stir in artichoke hearts and spinach. Spread into a lightly greased small baking dish (I used a 1 1/2 quart dish). Top with mozzarella cheese.

Baked for 20-25 minutes. Serve with tortilla chips or french bread.

Slightly adapted from: What’s Cookin’ Chicago?

Sunday, January 29, 2012

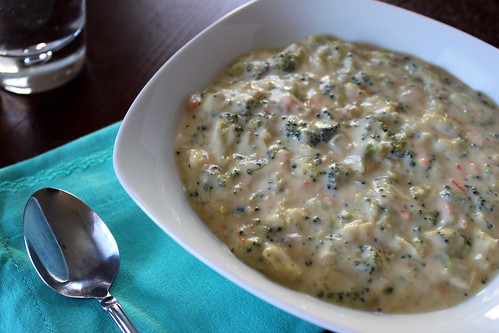
Broccoli Cheddar Soup

Broccoli and Cheddar Soup

Several years ago, before we got married, Russell lived in Oklahoma and suffered through the worst ice storm in years. A few years later, when we lived in Northern Virginia, we went through some of the worst snow storms in decades (our first experience shoveling snow). Jake spent his first week home from the hospital in a blizzard; in Georgia! In short, when we realized we would be facing a Kansas winter this year we weren’t too excited due to our history of carrying terrible weather with us. As soon as we moved to kansas we ordered a snow shovel and an ice chopper so we would be prepared for anything.

Luckily, this winter has been mild compared to most Kansas winters (knock on wood it stays that way!). I believe there has been one big snow storm so far, and that occurred while we were home for Christmas. Even though this winter had been mild, it has still been very cold--as in some days not getting above 20 degrees F cold. A few weeks ago there was sleet and light snow-- and when the weather gets colder, I want soup. I have been on a soup kick (more like obsessed with soup) and have been making a new soup about once a week. It is perfect for when it is cold and snowing and makes great leftovers.

Red birds in the snow
Red birds playing in the snow outside our window. Bailey really enjoyed watching them.

My sister sent me this recipe for broccoli cheddar soup and I could not wait to make it. We always send each other recipes and I can always count on her to send me something great--This soup was no exception. It is very similar to Panera’s broccoli and cheddar soup, but better. I think the best part of the soup is the broccoli, so I used two small heads of broccoli (about a pound) to make sure there was enough for each bite. Russell had his over white rice--while I preferred a crusty piece of French bread.


Ingredients:
  • 1/2 yellow onion, diced and sauteed
  • 1/4 cup butter (4 Tablespoons)
  • 1/4 cup flour
  • 2 cups half-and-half
  • 2 cups chicken stock
  • 1 lb. fresh broccoli, chopped into bite size pieces
  • 1 carrot, grated
  • 8 ounce block of mild cheddar cheese, shredded
  • salt and pepper to taste
Directions:

In a large pot, melt butter and whisk in flour. While constantly whisking, cook for 3-5 minutes. Add in the half-and-half.

Add the chicken stock and simmer for 20-25 minutes.

Next add the broccoli, grated carrot, and sauteed onion. Cook over low heat for another 20-25 minutes.

Season with salt and pepper to taste and then stir in shredded cheese. Cook until all cheese has melted. Serve over white rice or with crusty French bread.

Adapted from: Food.com

Sunday, January 08, 2012

Crab and Corn Chowder

IMG_3319
Russell and I have a beautiful kitty named Bailey. If you know me personally, you know that Bailey means the world to me. I always say that he is going to live until I am at least 70. We believe he is part Maine Coon and I am certain he is one of the softest kitties anywhere. Bailey has quite the personality, he greets new people at the door, carries his favorite toy (his green monkey) around with him everywhere, and loves to watch the birds. Most nights he sleeps with us at the end of the bed and greets us in the morning. He is truly one of the best cats.

Bailey1
Bailey as a kitten being mischievous

My sister and I adopted him while we were in college. Instead of selling pets, a local pet store adopted pets out from the local humane shelter. We got him when he was 9 weeks old and he had a rough first few days, so rough that we were told he might not make it. Luckily, being the strong-willed kitty that he is, he is still with us today.

Bailey 3Bailey 2
Bailey’s belly fur and Bailey with his green monkey (pictures taken with cell phone)

Branny over at Branny Boils Over is hosting a charity event called the SOUPer Bowl to help raise money for the ASPCA. I met Branny almost a year ago at BlogHer Food and in addition to being such a kind and genuine person, she is a true lover of furry friends (as my husband and I say). I am dedicating this crab and corn chowder to my favorite kitty Bailey for this Souper Bowl.

Whenever Russell and I go out for seafood the first thing I look for on the menu is crab. I think I could eat crab everyday and never get tired of it. When I first came across this recipe, I knew it would be wonderful. This crab and corn chowder is creamy, decadent, and so easy to make. It has the perfect amount of crab meat and the Old Bay seasoning is spot on. The corn at my grocery store did not look very good so I used frozen corn instead. The chowder still turned out great, but I can only imagine how wonderful it would be with fresh corn.


Ingredients:
  • 4-6 bacon slices, cooked and chopped, grease reserved
  • 1 orange bell pepper, diced
  • 1/2 yellow onion, diced
  • 4 cups chicken broth
  • 1/3 cup all-purpose flour
  • 3 cups fresh or frozen corn
  • 2 teaspoons Old Bay
  • 1/2 pound lump crab meat, picked free of any shells
  • 1 cup half and half
  • 1/4 teaspoon pepper
  • salt to taste
Directions:

Using the reserved bacon grease, in a large pot or dutch oven, saute the bell pepper and onion until tender.

Whisk together broth, Old Bay seasoning, and flour until smooth. Add to pot and stir in corn. Bring to a boil then reduce heat to a simmer for 30 minutes, stirring occasionally.

Stir in crab meat, half and half, salt, and pepper. Cook for an additional 3-5 minutes, until thoroughly heated. Serve with crumbled bacon on top. Sprinkle Old Bay on top, if desired.

Source: As seen on So Tasty, So Yummy, originally adapted by Our Share of the Harvest from Southern Living

“Soft kitty, warm kitty, little ball of fur. Happy kitty, sleepy kitty. Purr, purr, purr.” --The Big Bang Theory

Sunday, October 23, 2011

Chicken and Wild Rice Soup with Bacon

Chicken and Wild Rice Soup and Bacon 5

During the week things are pretty hectic. Russell tends to work late and something always seems to come up. Once Saturday finally arrives, Russell and I tend to take it easy. Most fall Saturday mornings consist of us getting up with the little one and lounging around until college football begins. These lazy Saturdays combined with cooler weather make me crave warm and comforting soup.

Chicken and Wild Rice Soup with Bacon 1

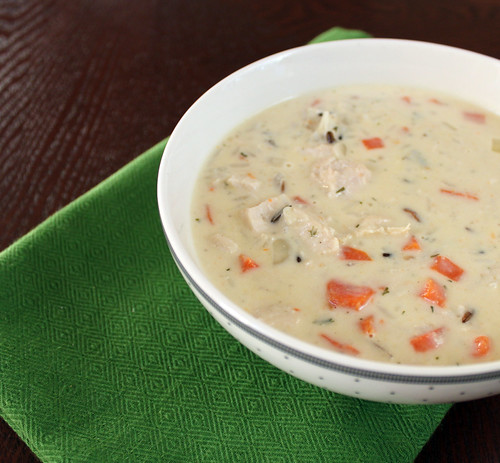
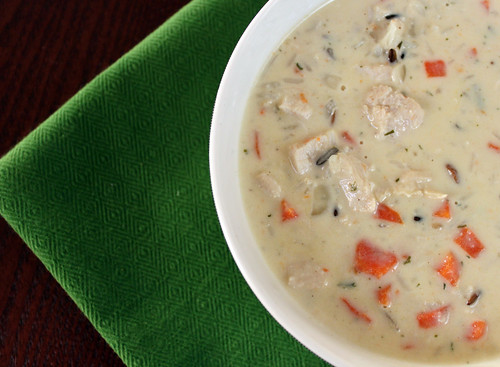
There are few things better than watching Alabama football while eating this chicken and wild rice soup with bacon! Out of all of the soups I have made so far this is one of my favorites. I had to stop myself from eating multiple bowls so we would have enough left over to enjoy it again on Sunday. Tender chicken, flavorful carrots, rice, and bacon in a creamy base makes this soup perfect!


Ingredients:
  • 3 strips of bacon, cooked and chopped, grease reserved
  • 1 small onion, chopped
  • 1 cup chopped carrots
  • 1/2 cup chopped celery (I omitted)
  • 2/3 cup wild rice, uncooked, rinsed and drained
  • 4 cups chicken stock
  • 1 cup heavy cream
  • 1 Tablespoon butter, melted
  • 1 Tablespoon flour
  • 1 teaspoon dried parsley
  • salt and pepper to taste
  • 2 chicken breasts, cooked and shredded
Directions:

Using the reserved grease from the bacon, saute the onions, celery, and carrots in a large stock pot until softened, about 5 minutes.

Add in the wild rice, chicken stock, chicken, and bacon and simmer for 25-30 minutes.

In a small bowl mix together butter, parsley, salt, pepper, and flour, stir in cream.

Slowly whisk cream mixture into the simmering soup. Allow to simmer on low for 10-15 minutes longer until thickened.

Source: The Beckville Church Cookbook via The Nest 

Sunday, August 14, 2011

Green Bean Bacon Bundles

It’s that time again--moving time. That’s right, Russell and I (and of course the baby) have moved to Kansas. We arrived about three weeks ago and, so far, Kansas isn’t too bad--although, we did arrive in the middle of a heat wave. We spent the month of June organizing and packing for our first move with the little one. As we were preparing to leave Georgia I found myself trying to use as much stuff from our freezer and refrigerator as possible. We have moved frequently in the last 4 years and with each move I have become better at minimizing the amount of food I am forced to throw away.

During this process I discovered we had bacon in the freezer. I do not know how bacon lasted so long in my freezer, but there it was waiting to be devoured! I decided I wanted to use it for something other than the usual breakfast fare. When I came across a recipe for green bean bacon bundles I thought it would be perfect. The brown-sugar and butter mixture adds the perfect amount of sweetness without being overpowering; and the bacon delivers a nice crispness. Overall these were definitely a winner. I served them as a side to our dinner, but they would also make a perfect appetizer.


Ingredients:
  • About 12 slices thick-cut bacon
  • 1 pound green beans, ends removed
  • 2 Tablespoons butter
  • 1 Tablespoon brown sugar
  • 2 cloves of garlic, minced
  • 1/4 teaspoon salt
  • 1/4 teaspoon pepper
Directions:

Preheat oven to 400 degrees F. Line a rimmed baking skeet or 9 x 13 pan with foil and spray with non-stick spray.

Rinse green beans and thoroughly dry. Season with salt and pepper.

Make a bundle using approximately 5-7 green beans. Wrap a piece of bacon in the center of the bundle to hold the green beans together. Repeat with the reaming green beans, placing each bundle seam side down on rimmed baking dish.

In a small saucepan over low heat, add butter, sugar, and garlic. Whisk until butter and sugar are melted and combined. Using a pastry or marinade brush, brush the mixture over the tops of the green bean bacon bundles.

Cover with aluminum foil and bake for approximately 35 minutes. Remove foil and bake for another 10 minutes or just until bacon gets crispy.

Source: How Sweet it is: Green Bean Bacon Bundles

Sunday, June 19, 2011

Rosemary Gruyere Beer Bread

I have recently broadened my use of various cheeses and I am discovering I enjoy several types that I previously neglected. I first used gruyere cheese this past Christmas while making a macaroni and cheese dish; it was such a success that I now bookmark every recipe using gruyere I find. My sister and mom came to visit this past week and I know my sister loves gruyere as much as I do (if not a little more)! I wanted to have something for us to snack on during their visit and thought this rosemary gruyere beer bread would be perfect. Unfortunately, we stayed busy and I wasn’t able to make this recipe until the morning that they were leaving. Luckily the bread was finished before they left and I sent my sister home with half of the loaf.

My sister and I contemplated adding 1 1/2 cups gruyere cheese instead of the 1 cup the recipe calls for, however I am glad that we decided on only adding 1 cup. Each flavor component of the bread: the beer, cheese, and rosemary, all shine through and if we had added any extra cheese the flavor may have over-powered everything else.


Ingredients:
  • 3 cups all purpose flour
  • 1 1/2 teaspoons salt
  • 1 1/2 Tablespoons baking powder
  • 3 Tablespoons sugar
  • 1 cup shredded Gruyere Cheese
  • 1 Tablespoon fresh Rosemary or 2 teaspoons dried Rosemary
  • 12 ounce beer, room temperature (I used Yuengling)
Directions:
Preheat oven to 350 degrees F. Spray a loaf pan with non-stick spray.

In a large bowl, combine flour, salt, baking powder, sugar, and rosemary. Stir in gruyere cheese. Add beer and stir to combine.

Evenly spread dough in prepared loaf pan. Bake for 50-60 minutes.

Once done, immediately remove bread from loaf pan and place on a cooling rack. Serve with melted butter.

Friday, June 10, 2011

Horseradish and Apricot Crostini + My Niece’s 1st Birthday Party Recap

I can’t believe my sweet niece turned one this past weekend! She is growing up so fast. My sister went all out for the party with a pink and green polka dot theme that was absolutely perfect. Russell had work to do which prevented him from coming to the party, so I left early Thursday morning to help my sister get things ready.

The food included:
  • Chicken Fingers
  • Ham and Cheese Sliders
  • Macaroni and Cheese
  • Caesar Salad
  • Horseradish and Apricot Crostini (Recipe Below)
  • Garlic Hummus with Cut Vegetables and Pita Chips
  • Fruit Skewers with Marshmallow Creme Dip
Desserts included:
  • Cupcakes
  • Raspberry Truffles
  • Cotton Candy and Lemon-Lime Jelly Beans
  • S’More Pops
  • “Key” Lime Pie Bites
  • Petit Fours (favors for guests to take home)
The drink table was set-up outside with bottles of water, limeade, and strawberry punch.

My sister did such a wonderful job planning the entire party. She didn’t overlook any detail and everything had just the perfect pink/green touch. Everyone raved about the food and had a wonderful time. My niece loved her smash cake (not pictured) and licked each finger to get every last bit of icing off that she could :). Overall the party was a complete success. I can’t wait to start helping to plan her 2nd birthday party ;)

One of the appetizers that everyone loved was the horseradish and apricot crostini; everyone raved about this appetizer and kept going back for more. The original recipe suggests serving it as a dip with crackers, but my sister thought it would be great on toasted french bread as well...and it was!

Horseradish and Apricot Crostini


Ingredients:
  • 1- 8 ounce package cream cheese
  • 1 Tablespoon jarred horseradish
  • 1/3 cup apricot preserves
  • 1/4 cup dried cranberries
  • 1 loaf of french bread, sliced and lightly toasted
Directions:

Cube cream cheese and place in a medium sized skillet. Heat over medium heat until cream cheese is softened.

Stir in horseradish, apricot preserves, and dried cranberries. Cook until heated through and all ingredients are well incorporated.

To serve, spread over sliced and lightly toasted french bread.

Horseradish and Apricot Crostini recipe adapted from: Crockpot 365
Back to Top